Thursday, August 14, 2014

Brat Bagel Pizzettes; Athenian Pizza

The bagel pizza called for mini-bagels, but I couldn't seem to find them at Cub.  I have said this before, but it bears repeating... Shopping is not my strong point.  I don't mind one trip to the grocery store, but I absolutely detest having to go to more than one place in the same day (as far as shopping and errands are concerned).  So, I was not about to go to another grocery store to find mini bagels.  I found bagel chips and deemed that a perfect substitute.  Also, it called for Canadian bacon and at one point, I had purchased a whole pile of Canadian bacon, because it was on close-out at Cub.  I bought a bunch and froze it all.  I was positive that I had several more hunks of it in my freezer.  But, when I came home from work on Thursday, I could not find any.  now, that doesn't necessarily mean I don't have any left, but I wasn't about to go digging this late in the game.  besides, I had leftover cooked brats in my refrigerator, and I thought those would work just fine.  And, slices of them were the perfect size for the bagel chips.  I also used red chili sauce I had made for a previous pizza and froze...  Simple, easy, and everybody loved them.  There were no leftovers.


BRAT BAGEL PIZZETTES
Adapted from The Everything Pizza Cookbook by Belinda Hulin

6oz bag bagel chips (such as New York Style Roasted Garlic Bagel Crisps)
3/4 cup red chile sauce
4 bratwurst links, cooked
2 cups shredded mozzarella cheese

Red Chili Sauce:
10 nuevo mexican chiles (3 ounces)
2T olive oil
3 ½ oz yellow onion
3T chopped garlic
1 teaspoon dried oregano
14½ oz can petite cut tomatoes, drained
14½ oz can chicken broth

Sauce:  Roast chiles at 400º until slightly toasted on all sides.  Remove from oven and cool until they can be handled.  Discard stems.  Split the chiles open lengthwise and discard seeds and membranes.  Heat oil in a saucepan over medium-high heat.  Add the onion and saute until soft, about 5 minutes.  Stir in garlic and oregano and saute for a minute longer.  Add the roasted chilis, the tomatoes, and the broth.  Bring to a boil over high heat, reduce the heat to low, cover, and simmer until the chiles are very tender, about 30 minutes.  Transfer the chile mixture to a food processor or blender.  Puree until smooth.

Assembly:  Spread the bagel chips on a greased cookie sheet.  Top each with a couple of teaspoons of sauce.  Top the sauce with a couple of slices of the cooked bratwurst.  Cover with mozzarella.  Bake at 350º F until the cheese has melted and starts to brown in spots.  Serve immediately.


The other pizza we made this week was Athenian.  It had all of the lovely flavors I associate with the Mediterranean area.  Salty feta cheese contrasted with the tangy, bright pickled peppers, red onions and oregano.  Kalamata olives reenforce the salty flavor of the feta, adding a little bit of fruitiness.  

ATHENIAN PIZZA
Adapted from James McNair's Vegetarian Pizza

Crust:
1 cup warm water
1 teaspoon active dry yeast
1 tablespoon granulated sugar
3¼ cups bread flour
1 teaspoon salt
¼ cup olive oil

Toppings:
1 tablespoon olive oil
1 red onion, thinly sliced and separated into rings
6 ounces baby Portabella mushrooms, thinly sliced
1 cup pitted Kalamata olives
1 cup sliced pickled cherry peppers
3 cups feta cheese
1 tablespoon dried oregano

Make the crust:  Combine the water, yeast, and sugar in a medium bowl.  Set aside for about five minutes to allow the yeast to form a thin layer of foam on the top of the water.  Meanwhile, combine the flour and salt in the bowl of a large stand mixer fitted with a dough hook.  Add the olive oil and yeast mixture and run at medium speed until the dough comes together and begins to cling to the hook.  Remove from the mixer and form into a ball.  Place the ball in a medium-sized, greased bowl.  Cover loosely with a towel or a piece of waxed paper and set aside to rise. It should double in size in about an hour.

Assemble and cook:  Preheat the oven to 500º F with a pizza stone inside.  Once the dough has risen, roll it out to about a 16 inch circle on a pizza peel or wooden board dusted with cornmeal.  Shake the board or peel to ensure that the crust is not sticking to it.  If it is, add some more cornmeal underneath the dough.  Brush the dough all over with olive oil.  Top with onion, mushrooms, olives, and peppers.  Sprinkle with the feta crumbles and scatter the oregano over the feta.  Transfer pizza to the preheated stone and bake for 10-15 minutes or until the cheese starts to brown or melt a little.  Let rest for five minutes. Slice and serve.


Back to the top
Back to the Brat Bagel Pizzettes recipe
Back to the Athenian Pizza recipe

Thursday, July 31, 2014

Hummus and Veggie Pizza with a Potato Crust


     Summer in Minnesota (especially July) is a great time for vegetables.  Gardens are overflowing with bright, fat peppers, zucchinis and cucumbers of all shapes and sizes, and tomatoes galore.  One of my go-to foods in the summer is roasted (or grilled) vegetables.  With my mind still reeling about what to make for my family that didn't contain gluten, wheat, meat, etc., I was thinking about these vegetables.  I wanted to incorporate them into a pizza, and roasting them and serving them with a drizzle of balsamic vinegar is delicious.  I just needed to work on the "crust".  Last week's crusts were okay, but the texture was all wrong.  
     Over the weekend, Jeff had made a giant platter of hashbrowns for us for breakfast.  He used the dehydrated hash browns purchased at Costco.  They come in a milk carton sort of thing that you open up an pour hot water into to rehydrate the potatoes.  It sounds weird, and I laughed when my mom had given us a package of these.  I thought that these sounded like something you would eat only out of desparation or when camping, because potatoes are too heavy to lug around.  But, I have to admit, with a little seasoning, these make delicious, crunchy hash browns.  Since one of lasts week's crusts was made with potatoes, it got me thinking that maybe I could incorporate hash browns as a "crust", so I gave it a shot.

Hummus and Roasted Vegetable Pizza with a Potato Crust

Crust:
1 4.9oz box of shredded, dehydrated hash browns
1 teaspoon of seasoning salt (I used Lawry's)
1 tablespoon olive oil

Hummus:
1 15oz can chickpeas, drained with some liquid reserved
2 tablespoons tahini
1 tablespoon lemon juice
1 clove of raw garlic
3 cloves of roasted garlic
½ teaspoon ground cayenne pepper

Veggies:
1 yellow bell pepper, cut into large pieces
½ of a large red onion, cut into large wedges
3-4 mini cucumbers, chunked up
8oz mini portabella mushrooms
1 tablespoon soy sauce
1 teaspoon cumin
1 tablespoon olive oil
½ cup balsamic vinegar

Crust:  Preheat the oven to 500º F with a pizza stone inside.  Rehydrate the potatoes as instructed on the side of the box (open carton and pour boiling or near-boiling water in up to the fill line; close carton and let sit for 12 minutes or so or until most of the water has been absorbed by the potatoes).  Drain the potatoes and pat dry with a paper towel.  Toss the potatoes with the olive oil and pat onto preheated pizza stone in a flat, even layer.  Bake at 500º until they brown.

Hummus:  Meanwhile, make the hummus.  Load all of the hummus ingredients into a food processor or blender and process until smooth.  Add some of the reserved chickpea liquid, if needed, to achieve a smooth, fluffy texture.

Veggies:  Toss the vegetables with the soy sauce, cumin, and a tablespoon of olive oil.  Spread in a single layer on a jelly roll pan.  Broil the vegetables on high until some charring occurs.  Remove from oven.
While the vegetables are roasting, pour the balsamic vinegar into a small sauce pan.  Cook over medium heat until reduced by half.

Assembly:  Once potatoes are browned, remove stone with the potatoes on it from the oven.  Spread the hummus mixture over the potatoes.  Top with the grilled vegetables.  Return the pizza and stone to the oven for a few minutes to heat the hummus and the rested vegetables. Drizzle balsamic reduction over the vegetables. Serve immediately.


     I started with the vegetables, since they would take the longest, and they were the star of the show.  I used what I had on hand.  I originally wanted to have zucchini in the dish, but our zucchini failed this year.  There was some strange bug that promoted a sort of rot on all of its fruits, so I went with the cucumber option.  I had never roasted cucumbers before, but how different could they be from zucchini once roasted?  And, the ones that I had were cute little ones, that could easily be cut into roastable pieces.
     I took a giant yellow bell pepper and hacked it into large, squarish pieces.  The onion, I cut into rough chunks as well.  I left the mini portabellas whole for the most part.  I halved the larger ones just to try and get their size to match the rest.  I placed them all into a large bowl and tossed them with soy sauce, cumin, and olive oil, so they were all coated nicely.  I spread them into an even layer on a sheet pan and broiled them until some of the pieces started to char and bubble.
    To differenciate this from just a hash of sorts, I thought it needed a sauce.  The usual combination for pizza is crust, sauce, toppings, and cheese, right?  And, since we were forgoing the cheese, I didn't want to forgo any of the other elements.  My sisters and I all love hummus, and it goes very well with vegetables, so I thought this would make a good "sauce" for my pizza.  I chose a double garlic recipe that I had made before and really enjoyed.  The creamy nuttiness of roasted garlic is accented by a small amount of raw garlic, making it zingy and delicious.
     When my hash browns were done, I pulled the stone out of the oven.  I started to attempt to remove the hash browns in one cohesive unit onto a serving dish, but there really wasn't any cohesion.  If I had added an egg, there might have been, but eggs were not allowed on the Daniel Fast.  Had I been thinking, I would have remembered that last week, I substituted flax and water to mimick an egg.  That may have worked here.  I left the hash browns on the stone and built my pizza there.
     It was a little tricky spreading the hummus over the non-cohesive potatoes, but I just plopped spoonfuls over the hash browns and spread them gently with the back of a spoon until the "crust" was mostly covered.  

     Next came the vegetables and the reduced balsamic vinegar.  It was really pretty with the yellow pepper, red onions, and green cucumbers.
     The flavor of the pizza was wonderful.  The balsamic was tangy and a little sweet, the vegetables crisp and toasty, the hummus smooth and zippy.  The hash browns even stayed crispy despite the vegetables and hummus on top of them.  The serving of the pizza wasn't easy, and it didn't resemble pizza at all when it hit the plate, but it was delicious.  
     Jennifer apparently had the same frame of mind as I did, because she brought with her a pizza topped with roasted vegetables!


Back to the top
Back to the Hummus and Veggie Pizza recipe

Thursday, July 17, 2014

Veggie Pizza Two Ways


     I gave myself a little bit of a challenge this week.  Jeff has been working on the floor in our kitchen and dining room, and rather than clear out all of the boards he had laid out on the dinner table and putting his tools back in the garage, we had been having pizza night at Jennifer's.  However, for the month of July, she has been on the Daniel Fast (http://danielfast.wordpress.com/daniel-fast-food-list/), which means, no meat, no dairy, no eggs, no sugar, no gluten, and no alcohol (among other things).  I felt a little guilty bringing over two meaty pizzas last week, when she couldn't eat any of them.  Also, I didn't think it would harm any of us to go vegan (and more) for one meal.
     I had been thinking about what I could make that Jennifer could eat since the previous Thursday.  I spent an afternoon with my friend Debi, and we talked about the possibilities.  We threw some ideas around, but nothing had really set in my brain.  I did some Google-ing during the week and found a few recipes, but most of them contained some really bizarre ingredients that I had only heard of in passing, and I was doubtful that I would be able to find them without going to Whole Foods (or, Whole Paycheck, as Jeff and I call it), and I really didn't want to go there.  Nor did I want to buy a whole bunch of weird ingredients that I would probably only use a little bit of and then have it sit around my kitchen until it went bad or I threw it away.            Eventually, I found a potato crust, but it used egg whites...  More Google-ing turned up an egg-white substitute - flax and water.  As I was contemplating this recipe, I received an e-mail from Debi - she had found an entire pizza recipe that fit most of the criteria.
  I had many of the ingredients (or at least ingredients I could sub in), and those ingredients I didn't have weren't so far out of my scope that I may never use them, so I figured I would give it a shot.

     Since I normally make two pizzas, I was debating about making one more kid- and husband-friendly, but then I thought if I did so, they wouldn't even try the vegan pizza, and the new experience would be lost on them.  Since I had two workable recipes I decided to go whole hog and do both (although, I did fear that I wouldn't be able to provide any more pizzas Jen could eat for the rest of the month, if I used both recipes on the first night out).
     I started with Debi's recipe, which came from a blog she had found:  /http://cleangreensimple.com/2011/03/vegan-gluten-free-pizza/.  On Wednesday, I began with the crust.  I had quite a bit of difficulty with it, but part of the problem may have been my substitutions.

VEGGIE PIZZA #1
(Adapted from cleangreensimple.com)

Crust:
1 teaspoon active dry yeast
1 cup warm water
1 tablespoon agave nectar
2 cups quinoa flour
1¼ chickpea flour
4 tablespoons ground flaxseed
1 teaspoon salt
¼ teaspoon ground oregano
½ teaspoon dried basil
½ teaspoon red pepper flakes
1 teaspoon apple cider vinegar

Sauce:
2 medium tomatoes (about 9 ounces), diced small, seeds removed
¼ teaspoon ground oregano
¼ teaspoon dried basil
½ teaspoon red pepper flakes
½ teaspoon salt
2 tablespoons minced garlic

Toppings:
½ of a red onion (cut into big hunks - I did wedges)
1 red bell pepper, cut into large pieces
1 tablespoon soy sauce
½ teaspoon garlic powder
1 teaspoon dried basil
½ teaspoon ground cumin
1 tablespoon olive oil
2 large (or four medium to small) mushrooms, sliced
¼ cup frozen corn

"Cheese":
1½ cups water
¼ cup nutritional yeast flakes
¼ cup chickpea flour
2 tablespoons Tahini paste
2 tablespoons corn starch
2 teaspoons fresh lemon juice
1 teaspoon onion powder
1 tablespoon minced garlic
3/4 teaspoon salt

Make the dough:  In a small bowl, dissolve the yeast in the water and agave nectar and set aside for at least five minutes.  It should get foamy on top. In the bowl of a large stand mixer fitted with a dough hook, combine the flours, flax seed, salt, oregano, basil, and red pepper flakes.  Stir at a low speed until these ingredients are combined.  Make a well in the center and add the yeast mixture and apple cider vinegar.  Run the mixer at a medium speed until the dough comes together, adding additional flour (either type), one tablespoon at a time, as necessary to transform the mixture into dough.  It will still be pretty soft and sticky.  Place in a greased bowl, cover lightly, and set aside to rise.

Make the sauce:  In a small bowl, combine all of the sauce ingredients and set aside.

Prepare the toppings:   Preheat the oven on a high broil.  In a medium bowl, combine the onion and bell pepper chunks.  Add the soy sauce, garlic powder, basil, cumin, and olive.  Toss well to coat the vegetables.  Spread the vegetables in one layer on a jelly roll pan.  Broil on high for about ten minutes, or until there is a slight charring on most of the pieces.  Remove from the oven and allow to cool somewhat.

Make the "cheese":  While the veggies are broiling, place all of the "cheese" ingredients in a blender and process until completely smooth.  Transfer to a small sauce pan.  Cook over medium-high heat, stirring constantly with a whisk until thick and smooth.  This should only take a few minutes, so don't walk away!

The assembly:  Preheat the oven to 450º.  Pat the dough into a 15 inch deep dish pizza pan with your hands, pushing the dough up the sides as well.  Try to get it as thin as possible without leaving holes.  Bake in the preheated oven for about 10 minutes or until the crust browns a little.  Remove from the oven.  Spread the sauce over the pre-baked crust. Layer the broiled vegetables over the sauce.  Scatter the mushroom slices over the broiled vegetables, and sprinkle the corn over the mushrooms.  Dollop the "cheese" over the toppings, using the back of a spoon to push/spread the "cheese" over the toppings.  Bake at 450º for 10-15 minutes or until the "cheese" begins to brown.  Allow to cool for at least five minutes.  Slice and serve.

     I had my doubts about this recipe.  I love cheese.  Real cheese.  I could never get used to the plasticene feel and flavor of fat free cheeses, and low-fat cheeses have never thrilled me either, and I thought I would truly miss cheese on a pizza.  Sure, we have had pizzas before that didn't have any cheese, and they were good.  But to pass some non-dairy item off as "cheese" on a pizza seemed a little bit like sacrilege. 
Par Baked Gluten-Free Crust
Raw Gluten-Free Dough Pressed into a Deep Dish Pan
     This really wasn't bad, though.  I know, that isn't a resounding endorsement, but I think with a little tweaking, it may be a pizza worth having again.  The crust was a little think and dense, and maybe a little pasty.  I think that could be resolved by making it thinner.  I had thought that the pre-baking would have helped (the original recipe didn't involve a pre-bake), and I think it did a little, but the crust was just too thick.
     I roasted a myriad of veggies I just happened to have around - zucchini, mushrooms, bell peppers, and onions - altogether for both pizzas.
Blurry Pic of Roasted Vegetables
    While the vegetables were roasting, I started in on the "cheese".  I have never worked with Nutritional Yeast Flakes before, and wasn't sure what to expect.  I combined the ingredients as instructed and put them in a sauce pan on my stove.  It said to cook and stir the sauce until it became thick, but as soon as I put the pan on the stove, I decided I was too hot.  I ran up stairs and quickly changed into shorts and ran back down stairs.  I couldn't have been gone more than a minute, and the sauce was already thick.

Uncooked "Cheese" Mixture

"Cheese" Mixture After a Minute of Heat


     After I had all of the elements of the first pizza taken care of, it was time to work on the potato-crust pizza.

VEGGIE PIZZA #2
Adapted from Food Network Kitchens

Crust:
14oz all-purpose potatoes (I used fingerlings here)
1/3 cup warm water
2 teaspoons agave syrup
1 teaspoon active dry yeast
1½ cups white rice flour
3/4 cup tapioca starch
Kosher salt
2 tablespoons ground flax plus 3 tablespoons water
1 tablespoon olive oil

Toppings:
½ of a red onion (cut into big hunks - I did wedges)
1 red bell pepper, cut into large pieces
1 small zucchini or yellow summer squash, sliced into quarter-inch thick medallions 
1 tablespoon soy sauce
½ teaspoon garlic powder
1 teaspoon dried basil
½ teaspoon ground cumin
2 tablespoons olive oil, divided
1/4 cup frozen corn

Make the crust:  Place the potatoes in a medium sauce pan.  Fill with enough water to just cover the potatoes.  Bring to a boil and cook until fork-tender, about 25 minutes.  Drain the potatoes.  Once they are coole enough to handle, work the potatoes through a ricer over the bowl of a large stand mixer fitted with a paddle attachment.  Stir together the warm water, agave, and yeast in a small bowl.  Set aside for about five minutes until the yeast starts to foam on the top of the water.  Add the yeast mixture to the potatoes.  Add the rice flour, tapioca starch, and 3/4 teaspoon of salt.  Mix on medium speed until mixture is crumbly.  In a small bowl, mix the flax and 3 tablespoons of water together to form a little bit of a paste.  Add this paste to the potatoes, along with the tablespoon of olive oil.  Continue mixing until the dough comes together cohesively.  Form into a ball.  Place in a greased bowl and cover loosely.  Set aside and let rise for about 1½ hours. 


Prepare the toppings:   Preheat the oven on a high broil.  In a medium bowl, combine the onion, zuchinni and bell pepper chunks.  Add the soy sauce, garlic powder, basil, cumin, and olive.  Toss well to coat the vegetables.  Spread the vegetables in one layer on a jelly roll pan.  Broil on high for about ten minutes, or until there is a slight charring on most of the pieces.  Remove from the oven and allow to cool somewhat.

Assembly:  Preheat the oven to 450º F.  Pat the potato dough into a greased deep dish pizza pan, covering the entire bottom of the pan.  Place in preheated oven and cook until crust begins to brown and set - about 10 minutes.  Remove crust from oven and brush with olive oil.  Scatter broiled vegetables over crust.  Sprinkle corn kernels over the broiled vegetables.  Return pizza to the oven for about 5 minutes or until corn and vegetables have heated back up.  Serve immediately. 

     The original crust recipe instructed to peel the potatoes before ricing them, but I find that when you put whole potatoes in the ricer, most of the peel stays in the ricer anyway, so this seemed like an unnecessary step.  I did get some peels in with the riced potatoes, but it just adds extra nutrients and a little bit of color.


     The crust recipe didn't have any instructions for how to cook it.  I decided this crust was pretty thick, too, and should be cooked first.  Also, I wanted to try to get a little browning on it, hoping it would be like a large potato cake.  So, I cooked it for a little while, just like the first crust.
     Once it came out of the oven, I was ready to assemble both pizzas.


Crust and Sauce for Veggie Pizza #1

Crust and Sauce with Broiled Vegetables for Veggie Pizza #1

Crust, Sauce, Broiled Veggies, and Mushrooms on Veggie Pizza #1
   
Veggie Pizza #2  - Fully Assembled and Ready for the Oven

Veggie Pizza #1 - Fully Assembled and Ready for the Oven

     Once the pizzas were fully assembled, I carted them over to Jennifer's house for the final cooking.  They weren't home yet, because Jonah had a baseball game.  Jeff and I hung out in their house while the pizzas cooked.  
     I didn't take pictures of the final, cooked, pizzas, because I thought they looked exactly the same post-oven as pre-oven.
     Roger brought home two meat pizzas from Papa John's, so he and the kids didn't try either of the vegan pizzas.  Jeff tried them and actually declared that they were good.  The crust on the potato pizza was a little bit of a strange texture, but again, I think that was because of the amount of crust.  Later, I reread the recipe and realized that the crust was supposed to make TWO pizzas.  OOPS!  Maybe if they were half the thickness and the pan was preheated, they would have more closely resembled the potato cake I was looking for.  The veggies on top were fabulous - full of flavor, well-seasoned, and a little crunchy in spots.
     I had thought that the "cheese" on the first pizza would have melted in the oven, but, like I said before, it looked almost exactly the same going in as coming out.  Despite its lack of "melting",  the "cheese" was actually really tasty.  If I closed my eyes and tasted it, I wouldn't think it was cheese, but it was thick, slightly salty, a little earthy, and had a really nice texture to it.  It was almost like a cross between thick gravy and feta cheese.  This flavor combined with the broiled vegetables was a great pairing.
     I wouldn't call this challenge a complete success, but it did open my mind up to future possibilities and ideas for improvement.  
   

Thursday, July 18, 2013

Shredded Turkey and Black Bean Pizza; Green Olive Pizza; Gold Member

     It's getting more and more difficult to prepare for pizza night with the kitchen remodel going on (or, right now, it is just the kitchen destruction).  In addition to removing half of the cabinetry in the kitchen, and the drywall on one wall in preparation for a sliding glass door to be installed, he has also decided to rewire the entire house.  He had to move the wiring that was in the wall where the door is going to go, so he decided to "clean up" what the previous owners had left for us 16 years ago.
     Consequently, I now only have one light in my kitchen instead of three.  I am missing one fixture altogether.  Only some of the outlets on the kitchen level work, and there are no lights in the south half of my basement (which has no windows, either, so that makes things interesting).

The North Wall of what used to be my kitchen What do we do with all these wires??
     When I was attempting to make the sauce for the olive pizza, I wanted to make quick work of it by using my Vitamix. First task was to find it, since all of my small appliances have been moved.  After it was found, I was trying to figure out where to plug it in.  
     I have come to realize that most small kitchen appliances have really short cords.  Apparently, everyone (except me right now) has outlets at counter level - or at least that must be what the small appliance manufacturers think, because the cords won't reach from the counter to a regularly positioned wall outlet.  
     I thought I had a good set up going - there was a free outlet in the dining room (where most of my kitchen items have been relocated), there was a chair nearby, and a box of outlet boxes (ironic, right?) that seemed sturdy enough to hold up a running Vitamix without falling over.  I got it all set up and plugged it in.  I put my ingredients in and...  That was one of the outlets that was temporarily out of order.  Plan B was to plug it into the outlet under the coat rack and sit on the floor to blend.  It wasn't ideal, but it got the job done.


     I was thankful that the weather was decent again this week.  It was a little humid, yes, but it wasn't raining.  I was going to be able to grill the pizzas again instead of trying to work around the messes in the kitchen.
     Again, I had made the crust doughs the night before.  I cheated a little.  I made a double batch of one of the dough recipes to cut down on time and the need for counter space.  The olive pizza was supposed to have a whole wheat crust, and the turkey pizza had a white crust in the recipe.  The wheat crusts have not been a hit so far, so I opted for two whites.
     Last week, I had tried to grill both pizzas simultaneously, which, while the end result was fine, it was a little dicey trying not to burn the bottoms of the pizza while still attempting to brown the tops.  I eventually ended up pulling one pizza off the grill to finish the other by itself over indirect heat.  Once that pizza was done and off the grill, I put the other back on and finished it..
     This week, I was smarter.  I cooked the one side of both crusts, but when they were ready to flip, I pulled one off, uncooked side down on my board.  I flipped the other one and shut the burner off underneath it.  Then, I was ready to assemble.

GREEN OLIVE PIZZA
Adapted from All the Best Pizzas by Joie Warner

Crust:
3/4 cup warm water
1-1/4 teaspoon active dry yeast
1/4 teaspoon sugar
1-3/4 cups bread flour
1/2 teaspoon salt

Sauce:
1 tablespoon minced garlic
9 ounces tomatoes
4 teaspoons tomato paste
1/4 teaspoon salt
1 teaspoon fresh oregano
2 tablespoons fresh basil
1/4 teaspoon red pepper flakes

The rest of the story:
2 tablespoons olive oil
1/2 cup pimiento stuffed green olives
4 ounces grated mozzarella cheese
1 teaspoon fresh oregano

Make the crust dough:  Combine the water, yeast, and sugar in a small bowl.  Set aside for at least five minutes.  Combine the flour and salt in the bowl of a stand mixer fitted with a dough hook.  Stir to distribute the salt evenly through the flour.  Add the yeast mixture and continue to stir at medium speed until the dough comes together.  Turn the mixer off and scrape the sides of the bowl to ensure that all of the ingredients get incorporated into the dough.  Stir on medium speed until the dough clings to the hook and looks smooth and elastic.  Place the dough in a greased bowl.  Cover with a damp towel or drape loosely with a piece of plastic wrap.  Set the bowl in warm, dry place for about an hour.

Make the sauce:  Place the garlic, tomatoes, tomato paste, and salt in the bowl of a blender.  Puree until smooth.  Stir in the oregano, basil, and hot pepper.

Assemble the pizza:  Preheat a gas grill to 500º F.  If using a charcoal grill, build a coal fire on one side of the grill.  Close lid in order to heat up the entire grill, while you roll out the dough.  On a flour or cornmeal dusted pizza peel or board, roll or stretch the dough out to a 13 inch circle.  Brush the dough with 1 tablespoon of olive oil all over.  Place the dough, oiled side down, onto the preheated grill grates.  If using gas, turn the burners on the other side of the grill off.  Grill dough for about five minutes or until bottom starts to crisp and brown a little. Brush the top of the dough with the remaining tablespoon of olive oil.  Flip the dough over onto the cooler side with the uncooked side down.  Spread the sauce over the crust, leaving a small border around the outside edge of the dough.  Distribute the whole olives over the sauce.  Sprinkle the cheese over the olives.  Close the lid of the grill and cook for another 10-15 minutes or until cheese is melted and starting to brown.  Remove the pizza from the grill and sprinkle the fresh oregano over the top before slicing.

Grilling pizza dough

Adding Sauce to the Crust

Fully Assembled Olive Pizza

     Once the olive pizza was assembled, I closed the lid and assembled the turkey and black bean pizza on the board it was resting on.

SHREDDED TURKEY AND BLACK BEAN PIZZA
Adapted from The Everything Pizza Book by Belinda Hulin

3/4 cup warm water
1-1/4 teaspoon active dry yeast
1/4 teaspoon sugar
1-3/4 cups bread flour
1/2 teaspoon salt
2 tablespoons olive oil
1 cup picante sauce (I used Pace Medium)
2 ounces diced red bell pepper
2 ounces yellow onion, diced
7-1/2 ounces canned black beans, drained and rinsed
1/2 lb cooked, shredded turkey
2 ounces shredded cheddar cheese
2 ounces shredded Taco cheese (blend of monterey jack, queso fresco, colby, cheddar, and spices)
4 ounces shredded mozzarella cheese
1/2 teaspoon hot pepper flakes
4 ounces diced tomatoes
1 teaspoon cumin
1/4 cup minced cilantro

Combine the water, yeast, and sugar in a small bowl.  Set aside for at least five minutes.  Combine the flour and salt in the bowl of a stand mixer fitted with a dough hook.  Stir to distribute the salt evenly through the flour.  Add the yeast mixture and continue to stir at medium speed until the dough comes together.  Turn the mixer off and scrape the sides of the bowl to ensure that all of the ingredients get incorporated into the dough.  Stir on medium speed until the dough clings to the hook and looks smooth and elastic.  Place the dough in a greased bowl.  Cover with a damp towel or drape loosely with a piece of plastic wrap.  Set the bowl in warm, dry place for about an hour.

Preheat a gas grill to 500º F.  If using a charcoal grill, build a coal fire on one side of the grill.  Close lid in order to heat up the entire grill, while you roll out the dough.  On a flour or cornmeal dusted pizza peel or board, roll or stretch the dough out to a 13 inch circle.  Brush the dough with 1 tablespoon of olive oil all over.  Place the dough, oiled side down, onto the preheated grill grates.  If using gas, turn the burners on the other side of the grill off.  Grill dough for about five minutes or until bottom starts to crisp and brown a little. Brush the top of the dough with the remaining tablespoon of olive oil.  Flip the dough over onto the cooler side with the uncooked side down.  Spread the picante sauce over the crust, leaving a ¼ inch border around the outside edge.  Sprinkle the red peppers, onions, and black beans over the sauce.  Distribute the turkey over the beans.  Cover the turkey with the cheeses.  Sprinkle the tomatoes over the cheese.  Dust the cheese with the cumin.  Close the lid of the grill and cook for about 10-15 minutes or until the cheese is melted and starts to brown.  Remove the pizza from the grill and sprinkle it with the cilantro.  Slice and serve.

Adding Turkey to the mix

Turkey Black Bean Pizza Assembled and Ready for the Grill

     This crust had gotten a little misshapen on its journey.  It started out round, but with the humidity, it had stuck to the board.  Pam and I loosened it with the spatula, but it didn't really want to slide off of the board and onto the grill, so I picked it up with my hands and laid it on the (hot) grill.  It stretched a little on the way and landed in a strange shape.  Because the grill was hot, the crust immediately started setting when it hit the grates.  So, this one is what I like to call especially "rustic".  Jeff said it looked like the shape of Montana.  Either way, I was sure that it would taste relatively the same as a round one.
     The olive pizza was done just about the same time I was done assembling the turkey pizza.  The cheese was just starting to brown up, and the crust was getting a little crisp on the bottom.

Grilled Olive Pizza

Up Close Olive Pizza

     Now, I am normally not a fan of green olives.  They are starting to grow on me, but they wouldn't be my topping of choice.  However, this pizza was outstanding.  I loved that the olives were still whole.  It gave them a nice chew.  There was very little salt in the rest of the pizza, so their brininess wasn't overwhelming.  I am not sure that I noticed the pimentos or would miss them if they were gone, but I really liked this pizza.  The olives were nicely nestled in the pools of mozzarella, and the sauce was sealed in nicely by the cheese as well.  It was simple and delicious.
     I think I was a little too impatient to let the turkey and black bean pizza get the lovely browning that the olive pizza achieved.  We had already tried the olive pizza and were definitely ready to dive into the next flavor.  It looked good, it just didn't have as much browning in the middle as the olive pizza had.


     I thought the taste, though, was outstanding.  This is definitely going to be one of my go-to recipes for leftover turkey.  The turkey stayed moist and juicey.  The beans were soft and creamy.  The picante added a little zip (I may add jalapenos next time), and the tomatoes and cilantro on top were nice finishing touches.


     We really should have paired these pizzas with a nice tequila drink of some sort, but I had to find a drink that I had all the ingredients for and could get to through my kitchen construction (or de-struction, since that seems to be the phase we are in right now).  I settled for Goldmember - a slightly spicey, appley concoction that was probably more suited to fall.  It was a little sweet for me to have more than one, which might not be a bad thing in the long run.

GOLD MEMBER

2 measures apple juice
1 measure cinnamon vodka
1/2 measure butterscotch schnaaps
1/2 measure sour apple schnaaps

Pour ingredients into an ice-filled shaker.  Close lid and shake vigorously.  Strain into a chilled cocktail glass.

Return to the top of the page.
Return to the Green Olive Pizza recipe.

Thursday, June 20, 2013

Olive Pizza Duel with Gingertinis


     I am not a great decision-maker, and I like to try new things.  One manifestation of this is that I make the next recipe in the pizza book - whatever it is.  This gets the decision-making out of the way, and we try things we wouldn't necessarily normally - just because it is the next recipe.  
    At one point in the history of pizza night, I found that if I were making two pizzas in one evening out of the same cookbook, I might frequently end up with two very similar pizzas.  Apparently, cookbook authors like to group similar recipes together.  I guess that makes sense, but I saw two similar pizza recipes from the same cookbook as some kind of parallel universe sibling rivalry.  Who is going to want to eat the plain blue cheese pizza, when there is also a garlic, blue cheese, and walnut pizza on the table?  Once, we ended up with two dessert pizzas (we, of course, ate them anyway and were happy about it).  
     Since I seemed to have a plethora of pizza-themed cookbooks (not to mention several other cookbooks that happen to have pizzas in them also), I decided (yes, a decision!) to have two books at my disposal and make one out of each every week.  At some point in the last year, I decided to throw a third book in the rotation, alternating the two new books every other week.  On a couple of occasions, two of the recipes from the separate books had turned out to be very similar - in which case, I would go on to a different recipe or use the book that wasn't "scheduled" for that week.
     Anyway, using my convoluted recipe scheduling formula, I still ended up this week with two olive tapenade pizzas.  I was marveling about this out loud while Jeff was in the vicinity and muttered something about having to decide which one to make and which recipe was going to be the non-tapenade pizza.  Jeff piped in and said I should make both and see which one we like better.  I shuttered at the thought of one pizza being left out in the cold while its other, more attractive brother was gobbled up and raved over.  However, I acquiesced, since I did not want to pick a new recipe to shuffle in or go off the "schedule" plan.
     After reading further into the recipes, I noticed that there were some obvious differences in them.  One recipe was for "tarts" or mini appetizer-sized pizzas, and the other one was a whole pie.  One was a mixed olive tapenade and the other was all kalamata olives.  The tarts had ricotta and Gorgonzola, where the whole pie had mozzarella.  
    The original recipe for the tarts called for a whole wheat crust, but I was gun-shy about making another attempt at whole wheat crust after the "rave" reviews I had from the last one.  I decided I was going to double the recipe for the crust for the whole pie and use half of the resulting dough for the tarts.  The other advantage to this was a more level playing field.  I didn't want either recipe to be ousted based on the crust.  If they were the same crust, there should be no problem there.
     
OLIVE PIZZA TARTS
Adapted from The Everything Pizza Cookbook by Belinda Hulin

3/4 cup warm water
1 teaspoon active dry yeast
1/4 teaspoon sugar
1-3/4 cup bread flour
1/2 teaspoon salt
7-1/2 ounces whole-milk ricotta cheese
1 cup mixed olive tapenade
4 ounces Gorgonzola cheese

Combine the water, yeast, and sugar in a small bowl.  Set aside for at least five minutes.  Combine the flour and salt in the bowl of a stand mixer fitted with a dough hook.  Stir together on a low speed until well combined.  Add the yeast mixture and stir at medium speed until the dough comes together, clings to the hook, and looks smooth and elastic.  Place the dough in a greased bowl and cover with a damp towel or drape loosely with a piece of plastic wrap.  Set the bowl in a warm, dry place for an hour.

Preheat the oven to 500º F.  Divide the dough into eight equal pieces.  On a cornmeal or flour dusted board, roll or stretch each piece out to a four inch circle.  Press each portion into a lightly greased tart pans, spreading the dough evenly up the sides of the pans (alternatively, if you do not have tart pans, pinch the edges of the dough up to form a rim and place on a greased baking sheet).  Divide the ricotta up evenly among the tarts, spreading them across the center of the tart.  Top this with two tablespoons of tapenade for each tart, followed by 1/2 an ounce of Gorgonzola cheese.  Bake for 10-15 minutes or until dough is browned and cheese has started to melt and brown.  Remove from the oven and let stand for 10 minutes before serving.

     I started out, thinking I was going to cook the tarts directly on a cookie sheet when I remembered that I actually have tart pans.  There was a previous recipe that had called for tart pans, and I didn't have them, so I did the cookie sheet method and had told my sisters about the inadequacy of my kitchen equipment.  Shortly thereafter, they bought me two sets of tart pans (for a total of 12 pans) for my birthday.  Have I mentioned that I love my sisters?

8 four-inch dough circles Tart Dough - Side View


     Even though I couldn't quite get the dough to fit in the pans just right, these were infinitely cuter than the flat disks they were before.  I hoped that their cuteness didn't give them an unfair advantage in the judging phase of the evening.
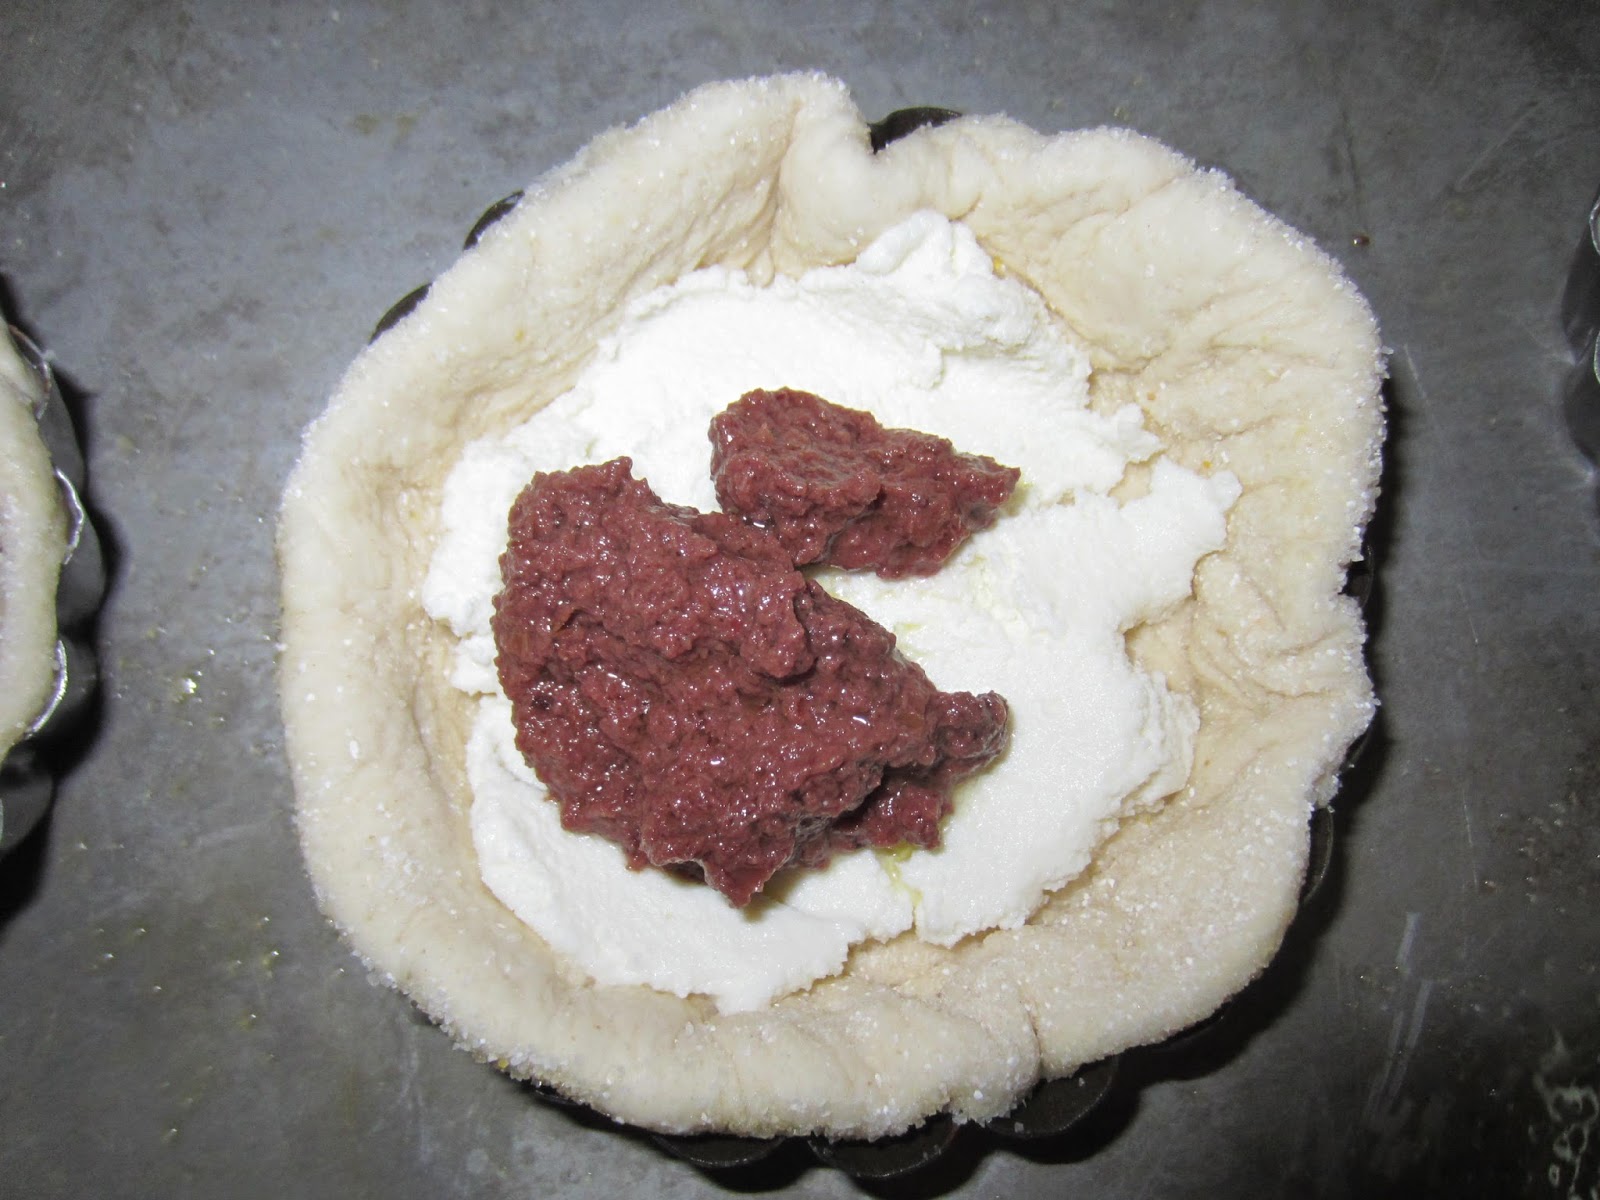
     Looking at the amounts of ricotta and tapenade, I didn't think that it would fill the tart very well, but it did.  I had to use the back of a spoon to sort of mush the ricotta to cover the bottom of the tart without ripping the dough.  I used the same method to spread the tapenade over the ricotta, so they didn't combine.  I wanted the layered effect.

8 filled tarts sitting pretty in their pans One Tart with Ricotta and Tapenade

     Next came the Gorgonzola (which I don't think is actually a true Gorgonzola, since it was made in Wisconsin).  I thought this, too, was a little skimpy, but I was going to trust the measurements.

One Oven-Ready Olive Pizza Tart Olive Tart Gang

TAPENADE PIZZA
Adapted from All the Best Pizzas by Joie Warner

3/4 cup warm water
1 teaspoon active dry yeast
1/4 teaspoon sugar
1-3/4 cup bread flour
1/2 teaspoon salt
1 cup Kalamata olives
1 teaspoon anchovy paste
1/4 cup olive  oil
8 ounces mozzarella cheese
1 teaspoon grated orange zest

Combine the water, yeast, and sugar in a small bowl.  Set aside for at least five minutes.  Combine the flour and salt in the bowl of a stand mixer fitted with a dough hook.  Stir together on a low speed until well combined.  Add the yeast mixture and stir at medium speed until the dough comes together, clings to the hook, and looks smooth and elastic.  Place the dough in a greased bowl and cover with a damp towel or drape loosely with a piece of plastic wrap.  Set the bowl in a warm, dry place for an hour.

Preheat the oven to 500º F with a pizza stone inside, if using.  On a cornmeal or flour dusted pizza peel or board, roll or stretch the dough out into a 14 inch circle.  Combine olives, anchovy paste, and olive oil in the bowl of blender.  Puree until mixture becomes a rough paste.  Spread paste over the prepared dough, leaving a small bare border around the outside edge of the pizza.  Cover the tapenade with the mozzarella. Sprinkle the orange zest over the cheese. Bake for 5-10 minutes or until cheese starts to brown.  

     I was anxious to see if the home-made tapenade was better than the purchased tapenade.  Mine was definitely smoother than the store-bought variety, thanks to my VitaMix.


     While the tarts were cute (as I have already mentioned), the large pizza had a certain elegance to it, with the contrasting colors of the mozzerella and the orange zest.  At least before it was cooked.  And, while it was cooking, we got our tinis going...

GINGERTINI

2 measures gin (I used Hendrick's - I love the refreshing cucumber-y finish)
½ measure ginger liqueur (I used Domaine de Canton)
¼ measure dry vermouth
¼ measure sugar syrup
lemon twist

Fill a cocktail shaker with ice.  Pour all ingredients (except twist) over ice and shake vigorously.  Strain into a chilled cocktail glass.  Garnish with the lemon twist.


    These were wondeful!  I thought that they were a little too sweet with the simple syrup AND the Canton, which is sweet in its own right.  Once I cut back (and eventually eliminated) the syrup, I thought it was perfect.  The zing of the ginger came at the first sip, and then I got a wave of refreshing cucumber flavor.  This is definitely a drink that will have to come back.


    Both pizzas were beautiful right out of the oven.  There ended up being no clear decision or ruling on the winner.  The tartlets were convenient - no cutting involved (unless you didn't want a whole one, but that certainly didn't happen).  One complete package - no worries about some of your toppings getting whisked away with errant cheese from someone else's piece.  The creamy, tanginess of the blue cheese went well with the tapenade, making it a rich little bundle.  The whole pizza was delicious, too.  The tapenade was almost indiscernible from the store-bought version.  It, of course, was better just because I made it, but I might be biased on that subject.  The mozzarella and orange zest combo cut the richness a little and kept everything together.  The reduced richness was nice against the smaller ratio of tapenade to bread.
   So, from a scientific standpoint, our experiment failed.  From a social standpoint, we had two great pizzas that had different merits and a lovely evening with our family.