Thursday, March 28, 2013

Pizza Margherita; Wild Mushroom Pizza; and Choco-Nut Martini

     Once again, I skipped over the eggplant recipes, and then I regretted it on Wednesday.  My husband left town for a few days, and we could have had an eggplant pizza with no complaints.  Live and learn.  There will still be a need for eggplant recipes when the summer comes, and we have an abundance.
     I love Pizza Margherita and always look forward to making and eating it.  It's like the mother of all pizzas - a humble beginning for all subsequent pizzas.  It's a simple dish - the basics are mozzarella, tomato, and basil.  It especially great in the summer (how I wish it were summer!), when the tomatoes are at their peak - thick, meaty, juicy tomatoes.  It's simple, but delicious.
     I know I have talked about how this particular item came to be, but it is still worth mentioning again.  It was "invented" in 1889 by a baker named Raffaele Esposito.  The pizzeria he worked was visited by King Umberto and Queen Margherita of Savoy.  He made three pizzas for them to try, and the Queen's favorite was this one, with the toppings corresponding to the three colors of the Italian flag (red, green, and white).  Raffaele then named that pizza after her, and it has been called that ever since.
     From everything I've read about her, she seems like she would have been a cool queen.  She was a mountain climber (unqueenly, isn't it?).  She was very philanthropic - she donated a great deal to the red cross (that's more queenly).  She didn't particularly want to marry her cousin Umberto, but it was arranged for the good of the country, so she was for it.  She was well-educated and loved music and the arts.  Apparently, she was more loved by her countrymen than her husband was, and did more for the unification of Italy than he did, too.  She endured his extra marital affair with Duchess Litta gracefully and still managed to encourage the entire country to honor him in his death.  It seems fitting that a noble pizza would be named after such a noble woman.

PIZZA MARGHERITA
Adapted from The Everything Pizza Cookbook by Belinda Hulin

Crust:
½ cup warm water
1 teaspoon active dry yeast    
¼ teaspoon sugar
¼ teaspoon salt
1½ cups bread flour
½ tablespoon (or 1½ teaspoons) olive oil

The rest of the story:
2-4 tablespoons of cornmeal (or as needed to roll out the dough)
1 tablespoon olive oil
2 tablespoons minced garlic
10 ounces thinly sliced tomatoes
15 ounces fresh mozzarella, sliced
¼ cup basil ribbons

Combine the water, yeast, and sugar in a bowl and set aside for at least 5 minutes.  Combine the salt and flour in a stand mixer fitted with a dough hook.   Add the yeast mixture and 1½ teaspoons of olive oil and stir on a low speed until dough comes together (you may have to scrape the sides a couple of times to get all the ingredients to combine well).  Continue mixing on a low speed until the dough begins to cling to the dough hook and becomes smooth and elastic.  Cover dough with a damp towel or a piece of plastic wrap and store in a warm, dry place for an hour or more to rise.

Preheat the oven to 500º F with a pizza stone inside, if using.  Dust a pizza peel or board with a couple of tablespoons of cornmeal.  Roll or stretch dough to a 14 inch circle, adding cornmeal as necessary to keep the dough from sticking to the board.  Brush the dough all over with a tablespoon of olive oil, getting all the way out to the edges.  Arrange the tomatoes over the dough without overlapping.  Top with the slices of mozzarella and basil ribbons.  Bake for 10-15 minutes or until cheese is melted and crust is starting to brown.  Remove it from the oven and allow it to cool for a few minutes before slicing.


     I debated about the garlic.  The recipe suggested minced garlic, and I was thinking it may be better with thin slices of garlic instead.  However, that would have required some extra work on my part, and I already had pre-minced garlic in a jar.  Maybe I will try it on a more ambitious day.
     Roma tomatoes are the best for this type of pizza.  They have more meat on them than regular beefsteak tomatoes.  They are hearty and flavorful and have less of the goo than regular tomatoes have between the meaty parts of the tomato.  Unfortunately, good Roma tomatoes are hard to find in the winter in Minnesota.  Those found at Cub this week were a sickly orange color and were pocked and bruised.  There were some lovely hothouse beefsteaks that I settled on instead.  I mean, really, it isn't pizza margherita if your only red ingredient is actually orange.
     I started out with a pound of mozzarella, but ended up eating bits of it along the way, so I think I ended up with about 15 ounces of cheese.  Fresh mozzarella is different than the regular block form you can find at any supermarket.  Its soft and almost sweet.  It's very pliable, too.  In fact, some of my slices were a little thicker than I wanted them, and I was able to just flatten them out with my (clean) hands to a thinner, dreamier dimension.

Speaking of the slices, the recipe called for cubes, which I thought to be a little strange.  I, of course, didn't see Rafaelle's version of this recipe, so I don't know what he used, but I have never seen one made that way.  I wasn't about to veer off into cube-land just yet.
     I arranged the stark white slices over the tomatoes, almost completely covering them up.  Jennifer isn't a fan of tomatoes, and I didn't want her to see how many there really were.  After sprinkling the shredded basil over the cheese, my Pizza Margherita was ready for the oven.


WILD MUSHROOM PIZZA
Adapted from All the Best Pizzas by Joie Warner

1/2 cup warm water
1-1/4 teaspoons active dry yeast
1/4 teaspoon sugar
1-1/2 cups bread flour
1/4 teaspoon salt
2 - 4 tablespoons cornmeal
3 tablespoon olive oil, divided
3 ounces of oyster mushrooms
2-1/2 ounces baby portabella mushrooms
1/4 teaspoon dried thyme
2 tablespoons shredded basil, divided
1/4 teaspoon freshly ground pepper
4 ounces shredded mozzarella cheese
1/8 teaspoon salt
1 ounce shredded Asiago cheese

Combine the warm water, yeast, and sugar in a small bowl and set aside for at least five minutes.  In the bowl of a stand mixer fitted with a dough hook, stir together the flour and salt.  Add the yeast mixture and stir to combine.  Continue mixing at a low speed until the ingredients are well-combined and dough begins to cling to the hook.  Mix a little longer until the dough becomes smooth and elastic.  Cover the dough with a damp towel or a sheet of plastic wrap and set aside in a warm, dry place for an hour or until doubled.

Preheat the oven to 500º F with a pizza stone inside, if using.  Dust a pizza peel or board with a couple of tablespoons of cornmeal.  Roll or stretch dough out to a fourteen inch circle, adding cornmeal if necessary to keep the dough from sticking to the board.  Brush the dough all over with one tablespoon of olive oil.  In a large bowl, toss the mushrooms, thyme, 1 tablespoon of shredded basil, and the ground pepper with the remaining two tablespoons of olive oil.  Spread mixture out over the dough, leaving a small untopped border around the edge of the dough.  Sprinkle the mozzarella over the mushrooms.  Distribute the salt, as evenly as possible, over the mozzarella.  Bake for 10-15 minutes or until cheese is browned and bubbly and crust is starting to become golden.  Remove the pizza from the oven and sprinkle with Asiago cheese and the remaining tablespoon of basil.

     I wasn't sure what selections of fresh wild mushrooms Cub would have, especially this time of year, but I didn't want to shop anywhere else this week.  The recipe wasn't specific on the type of mushroom (just "wild" and "fresh"), so I crossed my fingers and marched to their produce section.  My options were regular buttons, oyster mushrooms, or baby portabellas.  I already had baby portabellas at home (thank you, Costco).  Oyster mushrooms won out.  They came in 3.2 ounce packages, and the original recipe called for 5 ounces.  I could hear Jeff in my head, telling me that the recipe people conspire with the grocery people to sell items and quantities that are slow-movers.  with this in mind, I only bought one package and figured I could make up the difference with the baby bellas.
     Oyster mushrooms are strange entities.  When I took the cellophane off the package, I reached into it and grabbed them - or maybe i should say "it", because it was just one big clump of fungi.  They were softer than other mushrooms I have dealt with before.  I wasn't sure if they were really a little delicate or maybe Cub had hung on to them too long before I bought them.  They smelled good, though, so I continued on with the recipe.
Oyster Mushroom Gills

     I wasn't sure if I was supposed to cut them up or what.  The original recipe said to remove the stems.  There really wasn't much for stems, and since the original recipe didn't know what kind of mushrooms I was using, how did the author know that the stems shouldn't be included?  I assume that when a recipe calls for removing the stems and discarding them that the reason is that they are tough or inedible.  These didn't seem tough at all, and since I paid $17.45/lb (what???!  more than most cheese!) for them, I didn't want to waste much of them.  The very end of what might be considered a stem was a little tougher than the rest, so I discarded those pieces, but it wasn't much.  I separated the caps from each other, but I was still unsure about whether I should cut them up or leave them "whole".  I decided to toss them with the other ingredients and decide after I put them on the pizza.
Unmixed Pizza Toppings Mixed Up Pizza Toppings

     Once I had dumped them on my dough, there weren't enough of them to get even distribution, so I ripped some of the larger caps into pieces and spread them out in between the baby portabellas (also called crimini mushrooms).  I wanted to make sure that each piece got at least a taste of the oyster mushrooms.

     I put the cheese on over the mushrooms (it didn't seem like much cheese after the pound I put on the other pizza).  This one was ready for the oven at this point, too.  However, I didn't want to forget the "post-oven" directions, so I got my Asiago shreds out of the fridge and placed them on the counter next to where I thought I would place the pizza when it was done baking.  The original recipe called for Parmesan, but I wasn't going to buy that when I had Asiago and Romano in my fridge, and they are similar enough to warrant not spending any more money.
     Jen and Grace had arrived by then, and I had her start on shredding the basil for scattering over the cooked pizza while I started to look for the ingredients for our Choco-Nut martinis.  I didn't really think that this drink was going to pair well with our entrees, but I was looking for something different - something other than the fruity martinis we had been having, and I thought I had all of the ingredients for this one.

CHOCO-NUT MARTINI

2 measures vodka
2 measures hazelnut liqueur (such as Frangelico)
1 measure chocolate liqueur
cocoa powder

Combine all ingredients in an ice-filled shaker.  Shake vigorously.  Wet the rim of a cocktail glass with a little liquid from the cocktail shaker.  Pour some cocoa powder in a wide, shallow dish.  Dip the martini glass rim into the cocoa powder to "dust" the rim.  Strain the liquid from the shaker into prepared cocktail glass.

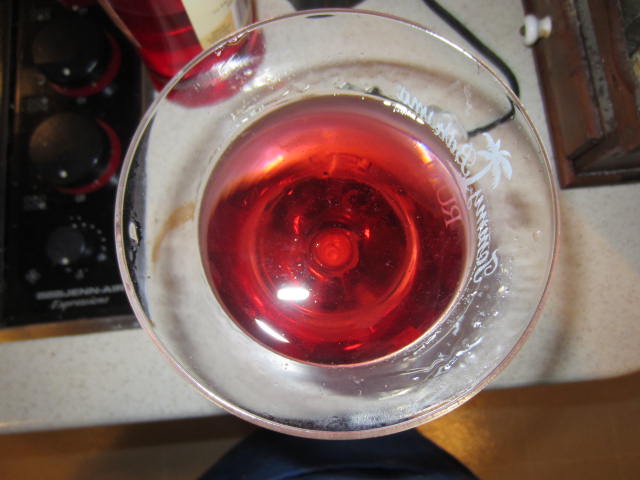
     As I said, I thought I had all of the ingredients for this drink when I picked it out, but it had originally called for creme de cocoa.  I searched high and low for the creme de cocoa I knew I had, but came up empty-handed.  I did find, however, some chocolate liqueur called Chocolat Royal Creme de Chocolat.  I think it is sweeter than creme de cocoa, and it is definitely thicker (and darker).  Knowing this, I reduced the amount to 1 measure instead of the original two.  It was fantastic.

    It was sweet on the first sip, but the slight bitterness of the cocoa powder and the strength of the vodka pulled it back a little.  It definitely wasn't going to go well with our pizzas, but it was tasty.  It wasn't exactly beautiful, though. It was a murky brown color, and the thickness of the Chocolat Royal made it look a little muddy.  I may have to try this again with the creme de cocoa, when I find it, and see which version I like better, but it is definitely a drink to keep on the roster for an easy dessert.
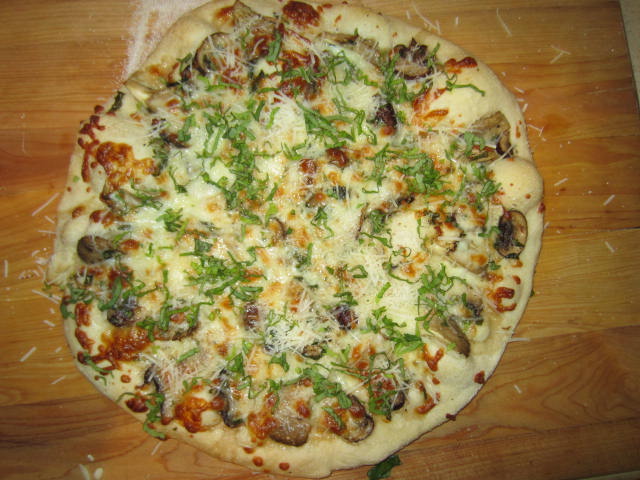
     The mushroom pizza was done baking first.  The cheese had toasted up nicely, and the crust was stiff and golden.  Areas of the crust had bubbled up, adding little domes of brown cheese to the landscape of it.  I pulled it out and added my cheese and basil.  It was beautiful.

     The Pizza Margherita was a little more "rustic".  I had failed to make the edges of the pizza thicker than the center, and the cheese had melted down over the tomatoes, over the edge of the crust, and over the edge of my pizza stone and onto the oven floor.  I wasn't worried so much about the mess on the oven floor as I was worried about the amounts of cheese I wasn't going to get to eat.  Jennifer and I drooled over the crunchy cheese bits that had solidified on the edge of the stone.  Some of it had formed icicle-like protrusions from the bottom of the stone.  We discussed how to get these yummy bits off of there and into our mouths and decided we would have to wait until the stone cooled, so we wouldn't burn our fingers and our tongues.
     I am not sure if fresh mozzarella does get brown in the oven.  I left it in for a few more minutes after we took out the mushroom pizza to see if it would.  I started to panic about burning the crust and losing more cheese, so I pulled it out.
     After we had set the table and brought the pizzas out, I started with the Margherita.  It was even better than I thought it would be.  The fresh mozzarella was buttery and nutty.  The tomatoes were sweet and bold, and the basil and garlic gave it a nice underlying zing.
     The mushroom pizza was delicious, too!  The oyster mushrooms had a sweet, delicate flavor that hinted of the ocean.  The baby portabellas gave it an earthy richness, and the cheese and puffed up areas of crust gave it a warm toasty flavor.  The fresh basil scattered on top gave it that little extra something to balance everything out.  Maybe next time around, I will spring for all oyster mushrooms.  Or, hunt my own...


Return to the top of the page.
Return to the Pizza Margherita recipe.
Return to the Wild Mushroom Pizza recipe.
Return to the Choco-Nut Martini recipe.

Thursday, March 21, 2013

Cheese and Red Onion Pizza; Olive Paste Pizza; and China Beach


     I broke with tradition a little bit this week.  I usually pick the next pizza in whatever two recipe books we are working on, and this week would have been two eggplant pizzas.  First of all, I didn't want to have two relatively similar pizzas on the same day - that's why I work out of three books instead of one (most recipe books tend to group similar recipes together).  Also, Jeff was still a little shell-shocked from the last eggplant pizza we had the previous week.  Not that he didn't like it.  He hated to admit it, but he really did like it, but I  knew he would complain if we had it two weeks in a row.  I moved on to the next pizza in each book.  I will revisit the eggplant when I have an overabundance in the summer.
     On Wednesday, I started with the crusts.  Both pizzas called for a basic crust, and each recipe had its own version.  I decided to make the two different versions to see which I liked better.  It turned out to be a tough comparison in the end, because the one crust was rolled out very thin, and the other one was thicker with a nice lip around the edge.

OLIVE PASTE PIZZA
Adapted from James McNair's Vegetarian Pizza

Crust:
1 cup warm water
2 teaspoons active dry yeast
1 tablespoon sugar
3¼ cups bread flour
1 teaspoon salt
¼ cup olive oil

Olive Paste:
6 cloves of garlic
½ cup (packed) basil leaves
1 cup kalamata olives
2 tablespoons lemon juice
½ teaspoon freshly ground black pepper

The Rest of the Story:
4 ounces Port Salut cheese
5 ounces Taleggio cheese
2½ ounces sliced red onion (separated into half-rings)
1 large tomato (about 9 ounces), diced
3 tablespoons shredded basil

Make the crust: Combine the yeast and water in a bowl and set aside for at least five minutes.  Stir the flour and salt together in the bowl of a mixer fitted with a dough hook.  Add the yeast mixture and the ¼ cup of olive oil and stir on a low speed until the mixture forms a ball around the hook.  Continue mixing a little longer  until the dough becomes smooth and elastic.  Let rest for an hour in a bowl in a warm, dry place.

Make the olive paste: Combine the garlic, ½ cup of basil leaves, olives, lemon juice, and black pepper in the container of a blender or food processor.  Puree until smooth and well-combined.

Assemble the pizza:  Preheat the oven to 500º F.  Divide the dough into 11 or 12 pieces.  Roll or stretch each piece into a 3½ inch circle.  Pinch up the edges to form a small lip around the entire circle.  Divide the olive sauce evenly between the dough circles.  Spread the sauce to the lip of each circle.  Crumble the cheeses and toss together to combine.  Distribute the crumbles over each of the mini pizzas.  Top with the sliced onion and diced tomato.  Bake in the preheated oven for about 15 minutes or until the crusts are golden brown, and the cheese has melted.  Remove from the oven and garnish with the shredded basil.

     My next task was to make the "olive paste".  Boy, I could think of much more appetizing words to call this - tapenade  olive sauce, olive puree - but "paste"??  The recipe for this paste was a little vague.  It called for ripe olives.  There are all kinds of varieties of olives that fall under the category of "ripe olives."  I guess I liked the open options, but it would have been nice to know which one was intended.  I suppose it comes back to the whole thing about making decisions.  I decided to go with kalamatas, because we went to Costco, and the options there were kalamata or regular black olives or an insanely expensive variety pack.  Regular olives seemed a little mundane for the basis of a pizza, and I was too cheap to get the insanely expensive ones.  I think that kalamatas are juicier and have a little more zip than regular black olives.  The texture is a little bit softer, too, but that doesn't really matter if you're going to make them into a "paste" anyway.
     It did seem like a shame to grind all the ingredients up together.  The purple kalamatas with the white cloves of garlic and the bright green basil leaves were beautiful together in my Vita Mix before I pushed the button.  Afterward, it was a dull grayish brown - taupe, maybe.  It tasted fantastic, though.  I may have overdone the garlic a tad (is that possible??), because the little taste I had off of the tip of my finger almost numbed my tongue.

      Also on Wednesday, I sliced the onions for both pizzas and readied the cheese.  The original recipe for the olive pizza called for Morbier, Port Salut, or Taleggio cheese.   I went to Byerly's on my lunch hour to look for one of these three options.  Unfortunately, I couldn't remember what the two of the options were when I had gotten to Byerly's.  I remembered Port Salut, because it is a favorite of mine.  I did remember that one of the other two options was a cheese that started with a "t" and had at least one "g" in it and sounded more like a pasta than a cheese.  I couldn't remember how much to get either, and I didn't have very much money on me, so I was hoping a little would do it.  I asked for the Port Salut, and the cheese expert there was just about to cut a wheel of it up for their case.  I told her I just wanted a little bit, and she handed me a little wedge that was a little over a quarter of a pound. While I was waiting for her to cut that wedge, I looked at all of the interesting varieties of cheeses they had in their case.  I found a little cube of Taleggio (about a quarter of a pound, too) and grabbed that also.
     When I had gotten home Wednesday night and was reading through the recipe, it said that the cheese should be shredded.  It made me wonder if the author had actually tested out these recipes as they were written.  I'm not sure what Morbier cheese is like, but Taleggio and Port Salut are really soft cheeses.  To shred them would be like trying to shred a block of cream cheese.  I thought maybe I could dice it up into little cubes, but that was nearly impossible too. I cut it up the best I could, put it in a bowl covered with plastic wrap, and put in the refrigerator for Thursday.  When I took it out of the refrigerator on Thursday, the cheese had reformed itself back into one big blob. So much for trying to save some time.
     I had another objection with this recipe, when I started working on it again on Thursday.  I again started with the dough.  The directions said to make the dough and roll it out and shape it as directed in the dough recipe.  The dough recipe itself said to either cut the dough in half and shape it into two ten inch pizzas, cut the dough into four pieces and fold them over to form calzone, etc.  Was this supposed to be a little appetizer pizza or a large pizza or what?  The picture showed little pizzas, or at least they seemed to be, so that was what I went with.  I wasn't sure how many it would make or how large the dough balls should be.  I just guessed and weighed my first one - 1.9 ounces.  Then, I made sure each subsequent dough ball was 1.9 ounces (can you say "OCD"?).  I got 11 of these.  It wasn't a nice, even number, but I wasn't sure how many people were coming anyway.  If it was the full seven I was thinking, we could each have one and a half and fight over the last half.  If it was six of us, each adult could have two, and Gracie (who was trying not to eat gluten anyway) could just have one.
     I rolled each little ball out into a 3½ inch circle.  I pinched all the around the edges to make a lip.  Looking at my olive "paste", which more resembled a glue in thickness, might just run out all over my baking sheet if there wasn't some sort of barrier.  Even with this small barrier, it may still run out all over the tray.  I was pretty proud of how uniform they all were and how circular I was able to get them - this is not an easy feat for me.


CHEESE AND RED ONION PIZZA
Adapted from All the Best Pizzas by Joie Warner

½ cup warm water
1¼ teaspoon active dry yeast
¼ teaspoon sugar
1½ cups bread flour
¼ teaspoon salt
1 ounce aged Gouda cheese
1½ ounces Gruyere cheese
1 ounce sliced red onion, separated into rings
3 tablespoons olive oil, divided
4 tablespoons cornmeal
1 tablespoon fresh basil, shredded
salt and pepper to taste

Combine the yeast and water in a bowl and set aside for at least five minutes.  Stir the flour and salt together in the bowl of a mixer fitted with a dough hook.  Add the yeast mixture and stir on a low speed until the mixture forms a ball around the hook.  Continue mixing a little longer  until the dough becomes smooth and elastic.  Let rest for an hour in a bowl in a warm, dry place. 

Preheat the oven to 500º F with a pizza stone inside, if using.  Dust a pizza peel or board with the cornmeal (one tablespoon at a time as needed) and roll or stretch the dough out to a 14 inch circle.  Brush the dough with 2 tablespoons of olive oil, making sure to get all the way to the edges.  Combine the cheeses together and sprinkle over the dough.  Arrange the onion rings evenly over the cheese.  Drizzle a tablespoon of olive oil over the cheese and onions.  Sprinkle the basil shreds over everything.  Salt and pepper to taste.  Bake in preheated oven for about fifteen minutes or until crust is golden brown and cheese is melted.


     The other dough was quite a bit stickier and hadn't risen much.  I was only able to roll it out to about 14 inches, and it was pretty thin.  I had a feeling this was going to be a bit more like a cracker than a pizza.  I brushed the circle with olive oil and started sprinkling my cheeses over.  I had taken a little liberty with the cheeses.  The recipe actually called for Parmesan, but I already had aged Gouda and some Gruyere hanging out in my fridge, and I didn't want to buy yet another kind of cheese after my expenditure on the Port Salut and the Taleggio.  I had grated both of my leftover cheeses and tossed them together before sprinkling them on the dough.
     My onion slices were almost paper thin. I wondered if they may crisp up on top of the cheese and drizzled with a little olive oil.  There was barely enough to reach all areas of my stunted pizza dough circle.  The onions were quite pungent, though, and I figured they would still add enough flavor to be worthwhile.  I opted for fresh basil instead of the dried it called for.  It's just prettier, in my opinion.   I am not sure that it greatly affects the flavor either way in the end - sure, I had to put on more basil than I would have if it were dried, because the dried basil has a little bit more concentrated flavor.
     I was ready to "paste" my mini pizzas.  Peering into my Vita Mix container (where I had left the concoction), it didn't seem like much.  I tried pouring it out onto the dough circles.  It was too thick.  I stuck a rubber spatula into the bottom of the container and dragged it out from underneath the blades.  I just haven't gotten the hang of getting all of the goo out from under there.  I ended up with about two tablespoons of sauce for each circle.
     I took my cheeses that had reformed into a ball and pulled off little globs one at a time and placed them strategically over each of the mini pizzas.  I topped this with the red onion pieces and diced tomatoes.

     At this point, Jennifer, Gracie, and Pam had arrived.  I had Jen start in on bar-tending.  We were going to make China Beach martinis.   I thought it would be a fitting drink for the evening.  My sisters, mom, and I are planning a trip to China this fall.  For Pam's birthday (which was Tuesday), I got her a couple of books on China.  One was about how to prepare for the trip and what to expect when you get there.  The other was about things to do and see, complete with maps and photos.

CHINA BEACH

1½ measures vodka
½ measure ginger liqueur
1½ measures cranberry juice

Combine all ingredients in an ice filled shaker.  Shake vigorously.  Strain into a chilled cocktail glass.  Garnish with a sliced of candied ginger on the rim of the glass.


     Wow!  This drink was really ginger-y.  It was zingy on the first taste, and then the cranberry came along and smoothed it all over.  It was tangy and a little sharp and very unique.  The first round was gone before the pizzas came out of the oven, so we reloaded the shaker. For the second round, I cut back a little on the ginger and increased the vodka.  It was even better.  Dangerously so, in fact.
     Jennifer had brought an appetizer platter with gorgeous peppers, asiago jalapeno dip, crackers, and various cheeses.  That also had disappeared before the pizzas came out of the oven.  She also brought a gluten-free pizza to contribute to the meal.  It had sausage and onions and olives on it.  She had made the crust with almond flour and other stuff.  The China Beach befuddled me a little bit, so I cannot remember what else she had put in the crust.


     I tried the red onion pizza first.  It turned out great.  The cheese had become one with the crust and held the onions in place on the surface.  It was crisp and delicious.  The onions were still strong but were mellowed by the cheese and having been toasted on the top of the pizza.  The cheeses gave it an almost nutty flavor, and the basil just kicked it up a notch.


     The olive sauce on the mini pizzas had also mellowed after having been cooked.  It was still very flavorful, so much so, in fact, that I think it overpowered the wonderful flavor of the two cheeses.  The recipe had called for 20 ounces of cheese, which I thought was overkill, especially with such strongly flavored cheeses, but maybe it needed that much cheese to keep up with the olives and garlic.  It was still a delicious pizza.  The crust was soft and pillowy, and I didn't have any leakage on my baking sheet (always a plus).
     Roger and Jonah joined us for birthday cake and presents for Pam.  I made the traditional Freese birthday cake - rum fudge bundt.  This rendition had spiced rum and oversize dark chocolate chips.  It was rich and moist, especially with the frozen vanilla custard Jen brought to go with it, but it really clashed with our drink of the week.

Return to the top of the page.
Return to the Cheese and Red Onion Pizza recipe.
Return to the Olive Paste Pizza recipe.
Return to the China Beach recipe.

Thursday, March 14, 2013

Turkey & Stuffing Turnovers with Cherry & Hazelnut Daiquiris

     It was a pizza night for two this Thursday.  The best part about it was I had most of the ingredients I needed for the recipe that I had "picked out."  The recipe was billed as a day after Thanksgiving recipe, but I had frozen all of my leftover turkey in November and hadn't had any since.  And, for some reason, I had a box of Stove Top in my pantry.  On Wednesday, I cooked up the stuffing according to the package directions, made the dough, and took the turkey out of the freezer.


TURKEY AND STUFFING TURNOVERS

Adapted from The Everything Pizza Cookbook by Belinda Hulin
(Makes 2 twelve inch calzones)

½ cup warm water
½ teaspoon yeast
½ teaspoon sugar
½ teaspoon salt
1½ cups bread flour
1½ teaspoons olive oil
½ cup jellied cranberry sauce
1 cup prepared stuffing
8 ounces shredded cooked turkey
2 tablespoons fresh Italian parsley
4 ounces shredded colby-jack cheese
½ cup water
½ teaspoon corn starch

Combine ½ cup of warm water, yeast, and sugar in a bowl and set aside for at least five minutes.  Combine the salt and bread flour in the bowl of a mixer fitted with the dough hook attachment.  Stir on low to combine.  Add the yeast mixture and the olive oil and continue mixing until dough clings to the dough hook.  Continue mixing until dough becomes smooth and elastic.  Put dough ball in a small bowl covered with a damp towel or loosely with piece of plastic wrap and put in a warm, dry place for at least an hour.

Preheat the oven to 375º F with pizza stone inside, if using.  Divide dough into to equal pieces.  On a cornmeal or flour dusted pizza peel or board, roll or stretch each dough ball into a twelve inch circle.  Place ¼ cup of cranberry sauce on each circle and spread evenly over the dough, leaving the edges bare.  Spread ½ cup of stuffing over one half of each circle, again, keeping the edges clear.  Top the stuffing on each circle with four ounces of shredded turkey.  Sprinkle 1 tablespoon of fresh Italian parsley over the turkey on each of the dough circles.   Distribute 2 ounces of cheese over the turkey on each of the dough circles.  Fold the untopped half of the dough circle over the filled side and pinch the edges together to seal, brushing the edges with a little water, if necessary to get the dough to stick together.  Combine ½ cup of water and ½ teaspoon of corn starch in a small bowl.  Microwave on high for 30 seconds or until mixture appears glossy.  Brush enough over the tops of each of the calzones to cover completely.  Discard any remainder or save in the refrigerator for another use (should keep up to two weeks in the refrigerator).  Cut three slits in the tops of each of the calzones for ventilation.  Bake for 20-25 minutes or until the tops of the calzone are golden.  Allow to rest for a few minutes before serving.

     When I got home from work on Thursday, I dug right in.  I rolled out the dough balls.  I spread the stuffing over half of each.  I topped it with turkey and parsley.  I was about to add the cheeese, when it struck me that I didn't recall reading anything about what to do with the cranberry sauce.  Oops!  I apparently had skipped one of the first instructions that said I should first spread the cranberry sauce over the entire circle.  


     I weighed my options at this point.  I could scrape everything off of the dough, put it in a bowl, spread the cranberry sauce over the circle, and pour everything back on.  I could just put cranberry sauce on the one uncovered side of the circle.  Then, a lightbulb went on over my head.  I could spread the cranberry sauce over the uncovered side, fold it over the filled side without sealing it, flip it over, open it back up with the filling on the cranberry side, and spread the remaining cranberry sauce over the recently filled side.


     It actually worked with minimal mess and minimal reordering of the filling.  Mission accomplished, and I was ready for the cheese again.


     I sealed both calzones up, trying to remember how Gracie did it a couple of weeks ago.  I even tried to get the pretty edge that she did.  It looked okay, but not nearly as pretty as hers.


     The recipe from the book had no wash for the calzones.  It didn't have you put anything over the tops of the crust to make it brown or glossy.  This is a problem for me, and I am still trying to work out a solution.  For the last calzones I made, I used a method my sisters and I had learned about in a bread-baking class - mixing corn starch and water, heating it up in the microwave, and brushing that on the crust.  I hadn't been entirely pleased with the result, but it was better than a naked crust.  I wasn't feeling adventurous or ambitious enough to try to come up with an egg and water or oil or butter or something else mixture, so I went with the mediocre solution.


     After brushing this mixture over the calzones and making slashes in the top crust, these were ready for the oven, and I was ready for a drink.


CHERRY & HAZELNUT DAIQUIRI

2 measures light rum
3/4 measure marschino liqueur
1-1/2 measures hazelnut liqueur (such as Frangelico)
1/2 measure freshly squeezed lime juice
1 cherry

Add all ingredients, except the cherry to an ice filled shaker.  Shake vigorously.  Strain into a well-chilled cocktail glass.  Garnish with a cherry.


     I think I may say this about every martini-style drink that has fresh lime in it, but I loved it!  It was very citrusy, with a hint of cherry, and an underlying nuttiness from the Frangelico.  It was slightly sweet, but still refreshing.
     Again, the results of the corn starch wash was less than spectalar, but it did help with the browining.  It did nothing to promote glossiness.  The baked calzones did look pretty nice, just not irresistably appealing.


     Once we cut them open and looked inside, they did become irresistably appealing.  We couldn't wait to dig into them.  My entire kitchen had that warm, sagey smell that can only come from turkey and stuffing.  It was like the day after thanksgiving.  These were delicious.  Warm, and savory with a tang of cranberry underneath.  Just that little bit of sauce really made the whole calzone.  The turkey was still moist (I had used all dark meat with the icky bits removed), and the stuffing was rich and toasty, and with the end of the mouthful, we got that ooey gooey cheesy sensation.  We had no leftovers - which is how a dish made from leftovers should be, right?


Return to the top of the page.
Return to the Turkey & Stuffing Turnovers recipe.
Return to the Cherry & Hazelnut Daiquiri recipe.

Thursday, March 7, 2013

Eggplant Parma Pizza; Mini Cheese Pizzas; and Champs-Elysees


EGGPLANT PIZZA, PARMA STYLE
Adapted from James McNair's Vegetarian Pizza

Crust:
1 cup warm water
1 tablespoon sugar
1 teaspoon active dry yeast
3¼ cups bread flour
1 teaspoon salt
¼ cup olive oil


Red Sauce:
2 tablespoons olive oil
4½ ounces minced onion
2 ounces minced carrot
2 ounces mincced celery
2 14½ ounce cans diced tomatoes, drained
1 tablespoons chopped garlic
2 tablespoons balsamic vinegar
2 tablespoons shredded basil

White Sauce:
3 tablespoons butter
3 tablespoons Wondra (or fine flour)
2 cups milk

Eggplant:
½ cup all-purpose flour
½ cup olive oil
½ cup canola oil
1lb globe eggplant, peeled and sliced crosswaise about ½ inch thick

The rest of the story:
2 ounces grated Parmesan cheese
3 ounces grated aged Gouda
2 tablespoons shredded basil

Make the crust: Combine the yeast, sugar, and water in a bowl and set aside for at least five minutes.  Stir the flour and salt together in the bowl of a mixer fitted with a dough hook.  Add the yeast mixture and the ¼ cup of olive oil and stir on a low speed until the mixture forms a ball around the hook.  Continue mixing a little longer  until the dough becomes smooth and elastic.  Let rest for an hour in a bowl in a warm, dry place.


Make the red sauce:  In a saucepan, heat the olive oil over medium heat.  Add the onion, carrot, and celery and cook, stirring frequently until the vegetables are soft, but not brown - about five minutes.  Add the tomatoes, garlic, and vinegar.  Increase the heat to high and bring to a boil.  Reduce heat to medium and cook until thickened and most of the liquid evaporates.  Stir in the shredded basil.

Make the white sauce:  In a saucepan, melt the butter over low heat.  Whisk in the Wondra, blending until smooth.  Cook for a couple of minutes, but do not brown the flour.  Whisk in the milk.  Continue whisking until mixture is smooth.  Simmer, stirring frequently, until thickened to the consistency of a rich cheese sauce - about 30 minutes.

Fry the eggplant:  Sprinkle both sides of the eggplant with salt and place in a strainer for about a half hour. Press on the eggplant to extract a little more liquid.  Rinse eggplant slices of the salt and pat dry with paper towels.  Pour both oils in a deep pan and heat over medium-high heat.  Place the flour in a shallow dish.  Dredge the eggplant slices in the flour, lightly coating them.  Once oil is heated, place two or three slices of eggplant in the pan (however many will fit in the pan without overcrowding).  Brown the eggplant on both sides.  Transfer the eggplant to a paper-towel-lined plate.  Repeat dredging, frying, and draining until all of the eggplant slices have been cooked.

Assemble the pizza:  Preheat the oven to 500º F with pizza stone inside, if using.  On a cornmeal dusted pizza peel or board, roll or stretch dough to a 15 inch circle.  Distribute the fried eggplant slices over the dough.  Spoon the white sauce over the eggplant and top with the tomato sauce.  Combine the Parmesan and Gouda together in a bowl.  Sprinkle about 3/4 of the cheese over the red sauce.  Transfer the pizza to the preheated stone or place on a greased pizza pan and put in the oven.  Bake for about 10 to 15 minutes or until the edges of the dough start to brown.  Remove from the oven and top with the remaining cheeses.  Sprinkle with the remaining shredded basil.


MINI CHEESE PIZZAS
Adapted from The Everything Pizza Cookbook

½ cup warm water
1 teaspoon active dry yeast
¼ teaspoon sugar
½ teaspoon salt
1½ cups bread flour
1½ tablespoons olive oil
1 cup prepared pasta sauce
8 ounces shredded mozzarella cheese
4 ounces shredded Asiago cheese
2 ounces shredded aged Gouda cheese
2 ounces shredded Gruyere cheese

Combine the yeast, sugar, and water in a bowl and set aside for at least five minutes.  Stir the flour and salt together in the bowl of a mixer fitted with a dough hook.  Add the yeast mixture and ½ tablespoon of olive oil and stir on a low speed until the mixture forms a ball around the hook.  If dough is too dry, add a little more water - no more than a tablespoon at a time - until dough comes together.  Continue mixing a little longer  until the dough becomes smooth and elastic.  Let rest for an hour in a bowl in a warm, dry place.

Preheat the oven to 500º F.  Divide the dough into 12 pieces.  Roll each piece out into a 3 inch circle.  Brush the tops of the circles with a little olive oil (about a tablespoon total).  Bake in the preheated oven for about 5 minutes.  Remove from the oven and allow to cool for a few minutes.  Spread a little more than a tablespoon of sauce over each of the circles.  Mix the cheeses together and distribute evenly over the mini circles.  Bake for about 6 minutes or until cheese is melted and starting to brown.


     I was glad my husband was working late on Wednesday, because there were a lot of things I wanted to get ready Wednesday night to make it easier on Thursday, when everybody showed up.  I started with the dough.  I had one dough in the freezer for the mini cheese pizzas, so I only had to make the dough for the eggplant pizza.


      Then, I tackled the sauce.  The original recipe called for regular flour as a thickener, but I had Wondra, and it really is wonderful for sauces.  It thickens up more quickly with less clumps than regular flour.


      Once the butter foamed up, it was time to add the magic thickening dust.


 And whisk.


 Add the milk and whisk some more.


    These were the beautiful eggplants I purchased for Thursday's dinner.  My husband claims to hate eggplants, although every time I make something with them in it, he comments that it wasn't so bad (which is guy-speak for "I don't want to admit it, but I really liked that").  The recipe had called for two pounds of eggplants, which turned out to be two eggplants.  I actually peeled them as the recipe instructed, even though the picture accompanying the recipe looked like they weren't peeled.


      I found that my regular bowls were just wide enough to fit one slice of eggplant in it.  I thought that they were perfect for flouring the eggplant.


     I started out with three slices of eggplant.  I dredged them in my little cereal bowl and placed them on a plate.  Then I walked them over to my pan of hot olive oil.  The recipe called for equal portions of olive oil and vegetable oil.  In my mind, olive is a vegetable, so I just used all olive oil.  I realized later that was a mistake.

Frying Eggplant

     The first few slices turned out okay.  They browned nicely, smelled great, and were tempting me to eat them as they were.  However, after a couple of batches, things started to go horribly wrong.  My pan started smoking, and I thought that the eggplant slices were burning, but it was really the olive oil and the little leftover bits from the previous eggplants that were smoking and blackening and clinging to my fresh slices.  I stopped frying after the first pound, because I didn't want to continue to fill my kitchen with the acrid smoke that was pouring off the pan, and I wasn't in the mood to fry any more after I'd emptied my pan of the blackened oil.  Apparently, the "vegetable" oil, which I imagine to be canola or something, has a lower smoking point than olive oil, so together they can withstand a lot more heat than olive oil can alone.


     Overall, the eggplant slices I did fry didn't look too bad.  There were some that were a little darker than I had anticipated, but I tried some of the dark ones on their own, and they didn't have an adverse taste.  I saved the remaining eggplant in the event that I would want to make new fried eggplant on Thursday.


       After that fiasco, I decided to start on the red sauce.  It starts as any good red sauce starts with mire poire - or the holy trinity - or whatever you want to call it.  Almost every culture starts a sauce, soup, or stew with onions, celery, and carrots, and  they all call it something different.


      These lowly vegetables get sauteed until they're soft and then other ingredients are added to make them delicious.  Or, more delicious, if you are a celery-onion-carrot lover (I am not - onions, yes, celery and carrots - no).  Here I added tomatoes, garlic, and balsamic vinegar.  Immediately, the aromas changed.  There were wisps of tangy acidity from the balsamic, a warm sweetness from the cooking garlic, and robust, almost citrusy wafts from the tomatoes.


    After that concoction had cooked down to a nice, thick, ragu, I boxed it up and put it in the refrigerator.  The original recipe called for it to be pureed into a uniform consistancy, but I kind of liked the idea of having a chunky sauce over my fried eggplant.  I also envisioned that the pureed sauce would end up running off the edg eof the pizza and into the bottom of the oven.  I also thought about the additional tools or containers I would have to wash if I transfered the sauce to the Vita Mix or used my Cuisenart stick blender to make the sauce uniform.  I was saving that decision for Thursday evening.


   Pammy and Gracie showed up first on Thursday, and I put them both to work.  I started Gracie on rolling out the dough for the mini pizzas and Pam on the dough for the eggplant entree.  Gracie complained a little bit about the dough being a little cold and stiff.  Pam said hers was fine, and maybe Gtracie didn't have the upper body strength to properly roll the dough out.   Gracie blamed the insufficeincy on the tools she was provided.  She said Pam was doing ok with her dough, because she had the large rolling pin, and all Gracie had was the little one-handed roller.  Pam came over and finished the little dough circles with the large rolling pin.  She tried one with the small one, and said (under her breath, so Gracie couldn't hear, of course) that maybe there was something to the tool issue.  She said it was much easier to roll out with the regular rolling pin than the one-handed roller.


     I had left the eggplant slices resting on the their paper-towel-lined plate after I had fried them.  They had soaked up a lot of oil in the frying (was my oil not hot enough?).  I thought if I left them out to "air-dry", they would dry up a little and stay or get crisper.  A scary thing happened, though.  There was so much oil in those little eggplant slices, that it had oozed into the paper towels that they were laying on and continued to do so until the paper towels started oozing onto my counter.   It was a little scary and a little unappetizing.  And, the eggplants themselves?  Well, they had lost any crispness that they had had, and were a soggy gooey mess.  When Pam and Gracie came over, I asked Pam if she thought I should fry some new eggplant.  she brought up a good point.  I could fry new eggplant to a crispy glory, but then I was going to put it on top of a moist crust, top it with two different, very wet sauces, and cook it again.  It didn't matter if they were crisp.  I went with the original pound fried.


The white sauce had thickened quite a bit overnight in the refrigerator.  I had to microwave it for a bit just to get it pliable again.  I handed it to Pam to spread over the eggplant slices I had arranged on the crust.  She eneded up microwaving it again to get it a little more spreadable.


    I also polled Pam on whether she thought that the red sauce should be pureed.  She wouldn't offer her own opinion, but suggested that if I am making the recipe, it was up to me to decide how I wanted to make it.  I said I didn't want to dirty any more dishes, and I like chunky marinara sauces, so I was going to leave it as is.  And, I did.

Marinara Topped Eggplant Thick Eggplant Parm Pizza
     This was going to be a thick pizza!
     Then, we turned our concentration to the mini pizzas.  Grace and Pam had made nice work of the mini dough circles.  I think I was probably supposed to have twice the amount of crust, but they had rolled them out as I instructed - to the diameter I had asked for and everything.  They weren't perfect, but they were rustic and beautiful.


      After baking, most of the circles ended  up looking like they were afflicted with a boil outbreak.

Baked dough circlesMini Pizza Crusts


Then, we burried that beautiful, chunky marinara sauce for the eggplant pizza in a flurry of grated cheeses. If we hadn't seen the pizza come together, we never would have been able to guess that there was eggplant and white sauce underneath that pile of cheese.


     Speaking of piles of cheese, the mini-cheese pizzas were certainly going to live up to their title.  The cheese literally had to be mounded in the middle of each crust, just to stay on it.  I wondered how it would fare in the oven.


     Apparently, not very well.  There was cheese oozing all over my baking sheet.  I think each of the mini pizzas was trying to become one with the one next to  it.  Wait - trying?  No, they were succeeding!


     While we were waiting for the eggplant pizza to finish baking and for the cheese pizzas to become less molten, we started building our drinks.

CHAMPS-ELYSEES

1-3/4 measures cognac
1/4 measure green chartreuse
juice from 1/4 of a lemon
1/2 measure honey
3 dashes orange bitters

Combine all ingredients in a shaker filled with ice.  Shake vigorously.  Strain into a chilled cocktail glass.

Drink of the Week Champs-Elysees in the sisters' hands


     I like finding drinks that make use of the odds and ends in my liquor cupboard.  Green chartreuse is one of those.  This is an odd liqueur that can make your nostril hairs curl just by sniffing it.  My dad and his buddies have unsuspecting newbies to their fishing opener parties drink a shot of it as some sort of sadistic initiation, so to turn it into something pleasant gives me great satisfaction.  The lemon and honey mellowed its pungency quite a bit, leaving us with a black-licorice sensation underneath the belly-warming, smoky cognac.
     

     The eggplant pizza was done cooking, and we actually remembered the "post-oven" directions to top it with the remaining cheese and the shredded basil.  Of course, it helped that we had those items ready before the pizza came out of the oven, and it helped that we hadn't finished our drinks yet.


     Despite the fact that Jeff claims that eggplant is poison and that he hates it, he actually liked the eggplant pizza.  He even helped himself to more than one piece.  It was a good pizza.  It was thick and rich.  The sauces were creamy and chunky all at once, and there were so many flavors going on there was no differentiating were the eggplant began and the sauce and cheese ended.  It felt like Italy on a crust.
     The mini cheese pizzas were a hit, too, even in their disheveled appearance.  Fights almost broke out about what spilled-over cheese belonged to which mini pizza.  All four of us girls fought over the most leaked pieces, because the cheese surrounding it formed a crunchy, chewy bit of heaven.  I briefly considered that maybe there had been too much cheese, but we really enjoyed it all - none went to waste.


Return to the top of the page.
Return to the Eggplant Parma Pizza recipe.
Return to the Mini Cheese Pizzas recipe.
Return to the Champs-Elysees recipe.