Thursday, March 7, 2013

Eggplant Parma Pizza; Mini Cheese Pizzas; and Champs-Elysees


EGGPLANT PIZZA, PARMA STYLE
Adapted from James McNair's Vegetarian Pizza

Crust:
1 cup warm water
1 tablespoon sugar
1 teaspoon active dry yeast
3¼ cups bread flour
1 teaspoon salt
¼ cup olive oil


Red Sauce:
2 tablespoons olive oil
4½ ounces minced onion
2 ounces minced carrot
2 ounces mincced celery
2 14½ ounce cans diced tomatoes, drained
1 tablespoons chopped garlic
2 tablespoons balsamic vinegar
2 tablespoons shredded basil

White Sauce:
3 tablespoons butter
3 tablespoons Wondra (or fine flour)
2 cups milk

Eggplant:
½ cup all-purpose flour
½ cup olive oil
½ cup canola oil
1lb globe eggplant, peeled and sliced crosswaise about ½ inch thick

The rest of the story:
2 ounces grated Parmesan cheese
3 ounces grated aged Gouda
2 tablespoons shredded basil

Make the crust: Combine the yeast, sugar, and water in a bowl and set aside for at least five minutes.  Stir the flour and salt together in the bowl of a mixer fitted with a dough hook.  Add the yeast mixture and the ¼ cup of olive oil and stir on a low speed until the mixture forms a ball around the hook.  Continue mixing a little longer  until the dough becomes smooth and elastic.  Let rest for an hour in a bowl in a warm, dry place.


Make the red sauce:  In a saucepan, heat the olive oil over medium heat.  Add the onion, carrot, and celery and cook, stirring frequently until the vegetables are soft, but not brown - about five minutes.  Add the tomatoes, garlic, and vinegar.  Increase the heat to high and bring to a boil.  Reduce heat to medium and cook until thickened and most of the liquid evaporates.  Stir in the shredded basil.

Make the white sauce:  In a saucepan, melt the butter over low heat.  Whisk in the Wondra, blending until smooth.  Cook for a couple of minutes, but do not brown the flour.  Whisk in the milk.  Continue whisking until mixture is smooth.  Simmer, stirring frequently, until thickened to the consistency of a rich cheese sauce - about 30 minutes.

Fry the eggplant:  Sprinkle both sides of the eggplant with salt and place in a strainer for about a half hour. Press on the eggplant to extract a little more liquid.  Rinse eggplant slices of the salt and pat dry with paper towels.  Pour both oils in a deep pan and heat over medium-high heat.  Place the flour in a shallow dish.  Dredge the eggplant slices in the flour, lightly coating them.  Once oil is heated, place two or three slices of eggplant in the pan (however many will fit in the pan without overcrowding).  Brown the eggplant on both sides.  Transfer the eggplant to a paper-towel-lined plate.  Repeat dredging, frying, and draining until all of the eggplant slices have been cooked.

Assemble the pizza:  Preheat the oven to 500º F with pizza stone inside, if using.  On a cornmeal dusted pizza peel or board, roll or stretch dough to a 15 inch circle.  Distribute the fried eggplant slices over the dough.  Spoon the white sauce over the eggplant and top with the tomato sauce.  Combine the Parmesan and Gouda together in a bowl.  Sprinkle about 3/4 of the cheese over the red sauce.  Transfer the pizza to the preheated stone or place on a greased pizza pan and put in the oven.  Bake for about 10 to 15 minutes or until the edges of the dough start to brown.  Remove from the oven and top with the remaining cheeses.  Sprinkle with the remaining shredded basil.


MINI CHEESE PIZZAS
Adapted from The Everything Pizza Cookbook

½ cup warm water
1 teaspoon active dry yeast
¼ teaspoon sugar
½ teaspoon salt
1½ cups bread flour
1½ tablespoons olive oil
1 cup prepared pasta sauce
8 ounces shredded mozzarella cheese
4 ounces shredded Asiago cheese
2 ounces shredded aged Gouda cheese
2 ounces shredded Gruyere cheese

Combine the yeast, sugar, and water in a bowl and set aside for at least five minutes.  Stir the flour and salt together in the bowl of a mixer fitted with a dough hook.  Add the yeast mixture and ½ tablespoon of olive oil and stir on a low speed until the mixture forms a ball around the hook.  If dough is too dry, add a little more water - no more than a tablespoon at a time - until dough comes together.  Continue mixing a little longer  until the dough becomes smooth and elastic.  Let rest for an hour in a bowl in a warm, dry place.

Preheat the oven to 500º F.  Divide the dough into 12 pieces.  Roll each piece out into a 3 inch circle.  Brush the tops of the circles with a little olive oil (about a tablespoon total).  Bake in the preheated oven for about 5 minutes.  Remove from the oven and allow to cool for a few minutes.  Spread a little more than a tablespoon of sauce over each of the circles.  Mix the cheeses together and distribute evenly over the mini circles.  Bake for about 6 minutes or until cheese is melted and starting to brown.


     I was glad my husband was working late on Wednesday, because there were a lot of things I wanted to get ready Wednesday night to make it easier on Thursday, when everybody showed up.  I started with the dough.  I had one dough in the freezer for the mini cheese pizzas, so I only had to make the dough for the eggplant pizza.


      Then, I tackled the sauce.  The original recipe called for regular flour as a thickener, but I had Wondra, and it really is wonderful for sauces.  It thickens up more quickly with less clumps than regular flour.


      Once the butter foamed up, it was time to add the magic thickening dust.


 And whisk.


 Add the milk and whisk some more.


    These were the beautiful eggplants I purchased for Thursday's dinner.  My husband claims to hate eggplants, although every time I make something with them in it, he comments that it wasn't so bad (which is guy-speak for "I don't want to admit it, but I really liked that").  The recipe had called for two pounds of eggplants, which turned out to be two eggplants.  I actually peeled them as the recipe instructed, even though the picture accompanying the recipe looked like they weren't peeled.


      I found that my regular bowls were just wide enough to fit one slice of eggplant in it.  I thought that they were perfect for flouring the eggplant.


     I started out with three slices of eggplant.  I dredged them in my little cereal bowl and placed them on a plate.  Then I walked them over to my pan of hot olive oil.  The recipe called for equal portions of olive oil and vegetable oil.  In my mind, olive is a vegetable, so I just used all olive oil.  I realized later that was a mistake.

Frying Eggplant

     The first few slices turned out okay.  They browned nicely, smelled great, and were tempting me to eat them as they were.  However, after a couple of batches, things started to go horribly wrong.  My pan started smoking, and I thought that the eggplant slices were burning, but it was really the olive oil and the little leftover bits from the previous eggplants that were smoking and blackening and clinging to my fresh slices.  I stopped frying after the first pound, because I didn't want to continue to fill my kitchen with the acrid smoke that was pouring off the pan, and I wasn't in the mood to fry any more after I'd emptied my pan of the blackened oil.  Apparently, the "vegetable" oil, which I imagine to be canola or something, has a lower smoking point than olive oil, so together they can withstand a lot more heat than olive oil can alone.


     Overall, the eggplant slices I did fry didn't look too bad.  There were some that were a little darker than I had anticipated, but I tried some of the dark ones on their own, and they didn't have an adverse taste.  I saved the remaining eggplant in the event that I would want to make new fried eggplant on Thursday.


       After that fiasco, I decided to start on the red sauce.  It starts as any good red sauce starts with mire poire - or the holy trinity - or whatever you want to call it.  Almost every culture starts a sauce, soup, or stew with onions, celery, and carrots, and  they all call it something different.


      These lowly vegetables get sauteed until they're soft and then other ingredients are added to make them delicious.  Or, more delicious, if you are a celery-onion-carrot lover (I am not - onions, yes, celery and carrots - no).  Here I added tomatoes, garlic, and balsamic vinegar.  Immediately, the aromas changed.  There were wisps of tangy acidity from the balsamic, a warm sweetness from the cooking garlic, and robust, almost citrusy wafts from the tomatoes.


    After that concoction had cooked down to a nice, thick, ragu, I boxed it up and put it in the refrigerator.  The original recipe called for it to be pureed into a uniform consistancy, but I kind of liked the idea of having a chunky sauce over my fried eggplant.  I also envisioned that the pureed sauce would end up running off the edg eof the pizza and into the bottom of the oven.  I also thought about the additional tools or containers I would have to wash if I transfered the sauce to the Vita Mix or used my Cuisenart stick blender to make the sauce uniform.  I was saving that decision for Thursday evening.


   Pammy and Gracie showed up first on Thursday, and I put them both to work.  I started Gracie on rolling out the dough for the mini pizzas and Pam on the dough for the eggplant entree.  Gracie complained a little bit about the dough being a little cold and stiff.  Pam said hers was fine, and maybe Gtracie didn't have the upper body strength to properly roll the dough out.   Gracie blamed the insufficeincy on the tools she was provided.  She said Pam was doing ok with her dough, because she had the large rolling pin, and all Gracie had was the little one-handed roller.  Pam came over and finished the little dough circles with the large rolling pin.  She tried one with the small one, and said (under her breath, so Gracie couldn't hear, of course) that maybe there was something to the tool issue.  She said it was much easier to roll out with the regular rolling pin than the one-handed roller.


     I had left the eggplant slices resting on the their paper-towel-lined plate after I had fried them.  They had soaked up a lot of oil in the frying (was my oil not hot enough?).  I thought if I left them out to "air-dry", they would dry up a little and stay or get crisper.  A scary thing happened, though.  There was so much oil in those little eggplant slices, that it had oozed into the paper towels that they were laying on and continued to do so until the paper towels started oozing onto my counter.   It was a little scary and a little unappetizing.  And, the eggplants themselves?  Well, they had lost any crispness that they had had, and were a soggy gooey mess.  When Pam and Gracie came over, I asked Pam if she thought I should fry some new eggplant.  she brought up a good point.  I could fry new eggplant to a crispy glory, but then I was going to put it on top of a moist crust, top it with two different, very wet sauces, and cook it again.  It didn't matter if they were crisp.  I went with the original pound fried.


The white sauce had thickened quite a bit overnight in the refrigerator.  I had to microwave it for a bit just to get it pliable again.  I handed it to Pam to spread over the eggplant slices I had arranged on the crust.  She eneded up microwaving it again to get it a little more spreadable.


    I also polled Pam on whether she thought that the red sauce should be pureed.  She wouldn't offer her own opinion, but suggested that if I am making the recipe, it was up to me to decide how I wanted to make it.  I said I didn't want to dirty any more dishes, and I like chunky marinara sauces, so I was going to leave it as is.  And, I did.

Marinara Topped Eggplant Thick Eggplant Parm Pizza
     This was going to be a thick pizza!
     Then, we turned our concentration to the mini pizzas.  Grace and Pam had made nice work of the mini dough circles.  I think I was probably supposed to have twice the amount of crust, but they had rolled them out as I instructed - to the diameter I had asked for and everything.  They weren't perfect, but they were rustic and beautiful.


      After baking, most of the circles ended  up looking like they were afflicted with a boil outbreak.

Baked dough circlesMini Pizza Crusts


Then, we burried that beautiful, chunky marinara sauce for the eggplant pizza in a flurry of grated cheeses. If we hadn't seen the pizza come together, we never would have been able to guess that there was eggplant and white sauce underneath that pile of cheese.


     Speaking of piles of cheese, the mini-cheese pizzas were certainly going to live up to their title.  The cheese literally had to be mounded in the middle of each crust, just to stay on it.  I wondered how it would fare in the oven.


     Apparently, not very well.  There was cheese oozing all over my baking sheet.  I think each of the mini pizzas was trying to become one with the one next to  it.  Wait - trying?  No, they were succeeding!


     While we were waiting for the eggplant pizza to finish baking and for the cheese pizzas to become less molten, we started building our drinks.

CHAMPS-ELYSEES

1-3/4 measures cognac
1/4 measure green chartreuse
juice from 1/4 of a lemon
1/2 measure honey
3 dashes orange bitters

Combine all ingredients in a shaker filled with ice.  Shake vigorously.  Strain into a chilled cocktail glass.

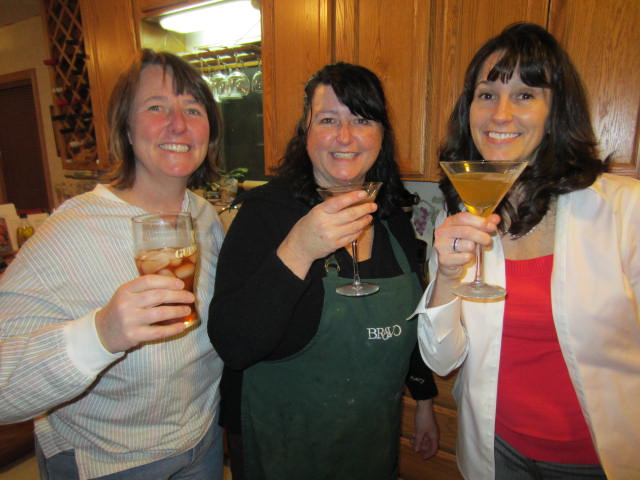
Drink of the Week Champs-Elysees in the sisters' hands


     I like finding drinks that make use of the odds and ends in my liquor cupboard.  Green chartreuse is one of those.  This is an odd liqueur that can make your nostril hairs curl just by sniffing it.  My dad and his buddies have unsuspecting newbies to their fishing opener parties drink a shot of it as some sort of sadistic initiation, so to turn it into something pleasant gives me great satisfaction.  The lemon and honey mellowed its pungency quite a bit, leaving us with a black-licorice sensation underneath the belly-warming, smoky cognac.
     

     The eggplant pizza was done cooking, and we actually remembered the "post-oven" directions to top it with the remaining cheese and the shredded basil.  Of course, it helped that we had those items ready before the pizza came out of the oven, and it helped that we hadn't finished our drinks yet.


     Despite the fact that Jeff claims that eggplant is poison and that he hates it, he actually liked the eggplant pizza.  He even helped himself to more than one piece.  It was a good pizza.  It was thick and rich.  The sauces were creamy and chunky all at once, and there were so many flavors going on there was no differentiating were the eggplant began and the sauce and cheese ended.  It felt like Italy on a crust.
     The mini cheese pizzas were a hit, too, even in their disheveled appearance.  Fights almost broke out about what spilled-over cheese belonged to which mini pizza.  All four of us girls fought over the most leaked pieces, because the cheese surrounding it formed a crunchy, chewy bit of heaven.  I briefly considered that maybe there had been too much cheese, but we really enjoyed it all - none went to waste.


Return to the top of the page.
Return to the Eggplant Parma Pizza recipe.
Return to the Mini Cheese Pizzas recipe.
Return to the Champs-Elysees recipe.

Thursday, February 28, 2013

St. Patrick's Day Brunch Pizza with Cham #69


     It was a little early for St. Patrick's Day, but this was the next pizza in line, and if I moved it to March 14th, I would actually have to pick a new pizza for this week, and I didn't want to have to do that.  Besides, this recipe sounded quite delicious, and I was really excited about making it.  I had been worried about what my non-egg eating potential guests might think of it, but no guests were able to make it this week.
     I had sent Jeff to the grocery store this week to get my ingredients.  He was unable to find a chunk of pre-cooked corn beef for me to shred for this recipe, so he had the deli slice some deli corned beef really thin.  They had gotten it so thin that it was almost completely in bits.  It was very tasty all by itself, and I was glad that he had purchased more than what I needed for the pizza, because Jeff and I had some really tasty sandwiches earlier in the week.
     I started on Wednesday, cooking my potatoes.  The original recipe didn't say how the potatoes should be cooked, just that they should be.  I really like little cubes of roasted potatoes - I like the crunchiness of them, and I like the toasty taste of the brown edges.  I decided I was going to try that, even at the risk of losing the crunchiness in baking the pizza.
     I cubed the potatoes, tossed them with a bit of olive oil, and sprinkled them with Harley's seasoning salt.  I nuked them for about 6 minutes, to get most of the cooking out of the way before I put them in the oven.  If I were to just put them directly in the oven, it would take an hour or more to get the crunchiness I like.  After microwaving them until they were soft, I put them in the oven at 450º F for a few minutes just to crisp up the outside edges.  They smelled so wonderful when I took them out of the oven, that I couldn't help but try a couple of cubes.


ST. PATRICK'S DAY BRUNCH PIZZA
Adapted from The Everything Pizza Cookbook by Belinda Hulin

Crust:
1 cup warm water
1 teaspoon active dry yeast
3½ cups bread flour
1 teaspoon salt
¼ cup + 1½ teaspoons olive oil

Mustard Cream Sauce:
3 tablespoons butter
1 tablespoon minced garlic
2 teaspoons fresh tarragon
4 teaspoons Dijon mustard
1-1/3 cup heavy whipping cream
3-1/2 ounces Parmesan cheese

Potatoes:
1lb raw potatoes, cubed
2 tablespoons olive oil
1 tablespoons seasoning salt

Pizza:
2 tablespoons olive oil
2 tablespoons corn meal
4 ounces chopped onions
7 ounces shredded corned beef
4 ounces shredded sharp cheddar cheese
4 ounces shredded mozzarella cheese
2 ounces of shredded Parmesan cheese
8 poached eggs

Make the crust: Combine the yeast and water in a bowl and set aside for at least five minutes.  Stir the flour and salt together in the bowl of a mixer fitted with a dough hook.  Add the yeast mixture and the ¼ cup of olive oil and stir on a low speed until the mixture forms a ball around the hook.  Continue mixing a little longer  until the dough becomes smooth and elastic.  Brush the dough ball all over with the 1½ teaspoons of olive oil.  Let rest for an hour in a bowl in a warm, dry place.

Make the mustard cream sauce:  In a small sauce pan over medium-high heat, melt the butter.  Add the garlic and tarragon and cook for about a minute.  Slowly whisk in the mustard and cream until well blended.  Cook until steam starts rolling off of the cream, but before it boils.  Stir in the Parmesan a little at a time while continuously stirring.  Continue stirring until the cheese is blended in, and the sauce is smooth.  remove from heat and allow to cool slightly.

Make the potatoes:  Preheat the oven to 450º F.  Toss the potatoes in a microwave safe bowl with the olive oil and seasoning salt.  Microwave on high for about 6 minutes or until the potatoes are slightly soft.  Dump potatoes out onto a baking sheet in a single layer.  Roast in preheated oven for 20-25 minutes or until they are golden brown.

Assemble the pizza:  Preheat the oven to 400º F.  Roll or stretch the dough out on a flour or cornmeal dusted board into a 10 x 15 inch rectangle.  Brush the two tablespoons of olive oil over the bottom and sides of a 10x15 bar pan.  Sprinkle the cornmeal over the olive oil and tilt the pan to get even coverage of the cornmeal.  Place the dough rectangle in the pan, stretching it a little to get a lip around the edges of the pan.  Spread the mustard cream sauce evenly over the dough.  Sprinkle the onions over the sauce and top the onions with the shreds of corned beef.  Cover the beef with the potatoes.  Top with the cheddar and mozzarella.  Bake for 20-25 minutes or until the top is brown and bubbly.  Remove from the oven and carefully arrange the poached eggs over the top of the pizza in two rows of four.  Sprinkle the eggs with the Parmesan cheese.

     I had made the mustard cream sauce Wednesday night, too, and put it in a container in the refrigerator.  On Thursday, I took the container back out of the fridge as soon as I had gotten home, but it was still really firm when I was ready to spread it over my dough.   I had to plop scoopsful of the sauce in various areas of the dough and smash them down with the back of my spoon - much like Gracie did last week with the jerk paste.


     The next instruction in the recipe was to mix the corned beef, onions, and potatoes together in a bowl and then top the sauce with them.  I didn't want to do that, for fear my potatoes would loose their crispiness.  I did mix the corned beef and the onions together, but I don't really see any advantage in this.  It seems to me that all it did was mess up another bowl.  I think sprinkling them one ingredient at a time would work just fine.

     When I had started working on the potatoes, I was thinking I had entirely too many for a pizza.  However, when I put them on over the beef, it didn't look like very many.  Now, it was true that I did sample a good number of them before adding them to the pizza, but I don't think it was a significant amount.  Maybe it was, who knows?


     The next step was to add the cheese.  The original recipe had called for two cups of cheddar cheese.  On Thursday, I found myself with only one cup of cheddar.  I improvised and added the same amount of mozzarella.  I know that isn't the same flavor profile, but my cheddar was extra sharp, and it packs a really strong flavor, so I knew it could withstand the test of a low-profile mozzarella in its midst.

     My dilemma here was when to poach the eggs.  I have watched a cooking show with Julia Childs, where she poached the eggs in advance and heated them up just before serving, but I couldn't remember the specifics of how she did it, and I was a little scared to try.  Since it was just the two of us, I decided to cook two eggs after I pulled the pizza out of the oven.
    So, while I was waiting, I had time to make my drink of the week.

CHAM 69

2 measures vodka
3/4 measure raspberry di amore
3/4 shot amaretto
juice of 1/4 lime
Fresca

Shake the first four ingredients in a cocktail shaker filled with ice.  Strain into a tall glass half filled with ice.  Top with Fresca.  Garnish with blackberries.

    This was a wonderful little cocktail.  It had a wonderful fruitiness and a lovely sparkle.  It tickled my tongue with the bubbles and zinged it with fruit, but it wasn't the overly sticky sweet I imagined it was going to be.  The amaretto gave it a nutty, earthy undertone, and the Fresca lightened up the heavy raspberry liqueur.  It was delicious and refreshing.  I would definitely make this again.
    I filled a 3½ quart sauce pan half-way full with water and added two tablespoons of plain, white vinegar.  The addition of vinegar to the boiling water, increases the acidity of the water, which lowers the temperature at which eggs will set.  If the eggs set quickly, they have less time to "feather out" or lose some of their whites to the water gods.  Swirling the water, making a whirlpool in the center of your pan by circling the spatula through the water while pouring the egg into the center of the whirlpool is supposed to help "wrap-up" the whites around the yolk.  I haven't found that to be the case yet, but I am a novice when it comes to poaching eggs.  I find it hard to swirl the water while pouring the egg at the same time.  It is a little like patting your belly and rubbing your head at the same time.
      The pizza came out of the oven a gorgeous, bubbly brown, cheesy thing of beauty.

   I had my vinegary egg water already heating before I removed the pizza from the oven, and my two little eggs were ready in moments following that.  Instead of putting them directly on the pizza, I cut each of us a slice, put the slices in bowls, and gently placed an egg on top of each one.  I have to admit, they were pretty good-looking.

   The yolks were just the right consistency, slightly thick, but still a bit runny, and when we cut into the egg, it made a nice sauce over all of the brown cheese. It made everything moist and rich and luscious. Once we cut into the pizza itself, the yolk co-mingled with the sauce, creating a sort of dreamy rich, cheesy, blanket over everything. I could taste the woodsy flavor of the tarragon underneath it all, punctuated by the sweet and zingy pow of garlic. The beef and the onions kept everything lively, and the potatoes even kept a little of their crispness. It was rich and filling and quite yummy.  I would definitely make this again.  This make a wonderful part of any brunch!  Adding a fruity little cocktail enhanced the breakfast experience.  All it needed was a side of bacon.

Return to the top of the page.
Return to the St. Patrick's Day Brunch Pizza recipe.
Return to the Cham #69 recipe.

Thursday, February 21, 2013

Caribbean Jerk Pizza with Tropical Salsa; Mardi Gras Calzones; Celery Martini

Shrimp & Andouille Sausage CalzonesCarribean Jerk Pizza with Tropical Salsa

     This Thursday turned out to be a quasi-girls night.  Jennifer and Roger were out of town, and Jonah was at civil air patrol.  Pam and Gracie and I were the chefs on staff for the night, and we had a great time doing it.  Jeff was there, but he came later (just for the food portion), then holed himself up in front of the television.

CARIBBEAN JERK PIZZA WITH TROPICAL SALSA
Adapted from James McNair's Vegetarian Pizza

Crust:
1 cup warm water
1 teaspoon active dry yeast
1 tablespoon sugar
3¼ cup bread flour
1 teaspoon salt
¼ cup olive oil

Salsa:
1 cup finely diced ripe mango
1 cup finely diced ripe pineapple
1/2 cup minced green onion (about 4 whole green onions)
2 tablespoons minced fresh red jalapeño
1/2 cup minced fresh cilantro
1 tablespoon seasoned rice vinegar

Jerk Paste: 
2 ounces yellow onion
4 green onions (½ cup roughly chopped)
1/2 teaspoon dried thyme
1-1/2 ounce minced jalapeño (I used green here)
1/2 teaspoon ground allspice
1/4 teaspoon roasted Saigan cinnamon
1/8 teaspoon freshly grated nutmeg
1 teaspoon hot pepper sauce (I used a mild habenero sauce)

The rest of the story:
1 tablespoon of olive oil
6 ounces of shredded mozzarella
8 ounces shredded sharp cheddar

Make the crust: Combine the yeast, water, and sugar in a bowl and set aside for at least five minutes.  Stir the flour and salt together in the bowl of a mixer fitted with a dough hook.  Add the yeast mixture and the olive oil and stir on a low speed until the mixture forms a ball around the hook.  Continue mixing a little longer  until the dough becomes smooth and elastic.  Let rest for an hour in a greased bowl in a warm, dry place.

Make the salsa:  In a small bowl, combine all the ingredients, including salt to taste.  Cover and chill for at least an hour, then drain well and return to room temperature before using. 

Make the paste:  Combine the jerk paste ingredients in the bowl of a blender or food processor.  Process until smooth.

Assemble the pizza:  Preheat the oven to 450º F with a pizza stone inside, if using.  On a cornmeal or flour dusted pizza peel or board, roll and stretch the dough into a fifteen inch circle.  Brush the dough all over with olive oil.  Spread the jerk paste over the crust, leaving a small border around the edge.  Top with the cheeses.  Transfer to the preheated pizza stone, if using, or place on a pizza screen or ventilated pizza pan and place in the preheated oven.  Bake for 10-15 minutes or until the cheese is bubbling and starting to brown.  Remove the pizza from the oven and top with the tropical salsa before serving.


     I made the salsa for the Caribbean pizza the day before.  I started with fresh pineapple.  I was able to use my cool new pineapple corer/slicer that Jeff had gotten me for my birthday last year.  It's really a slick little device.  It doesn't look like much - just a metal tube with a handle - but it actually has a piece of metal around the bottom edge of it with a blade and a half inch slot.  As you press down and turn the handle, that blade slices through the meat of the pineapple in a spiral pattern.  Once the metal tube gets to the bottom of the pineapple, the hard, bark portion of the fruit falls off, and you are left with a tower of pineapple that could possibly be used as a slinky and a metal tube full of pineapple core.

     Mangoes are one of those fruits that I am sort of ambivalent about.  The texture bothers me.  They either seem a bit slimy or a bit fibrous.  I am not sure if that is because I am not sure how to find a ripe mango or a good mango, or if it is just the way that they are.  I don't mind them in recipes, like salsa, chutney, smoothies, but I have given up on trying to eat them by themselves.
     These are two mangoes I bought a week apart.  I had read that color makes no difference when buying mangoes.  I bought the one on the right a week prior, and it was almost half red and half yellow.  After a week on my counter, it was almost completely yellow.  I wasn't sure if it was going to last until Thursday, so I bought the one on the left on Monday.  They have the same give point, but are two different colors.  Now that I have both of them, I watched a U-Tube video that says the green ones are inedible and need to ripen yet.  I decided that the yellow one was still fine and used that and will hold onto the green one for a bit longer and see what transpires.
     The salsa was fun to make.  There were so many different colors in it that it was downright beautiful - reds, greens, oranges, and yellows.  It was a work of art, really.
     I had Gracie roll the dough out for me when she came over on Thursday.  She had a little trouble with it at first, because it was still a little chilly from our 60º house.  It kept springing back to a smaller shape after she had rolled it out a bit, but she worked it out and made an almost perfect circle with a nice lip on it.
     I had thrown together the paste while she was doing that.  I actually used nutmeg.  Nutmeg is another item I generally try to avoid.  I never use the preground stuff any more.  To me, it smells and to some degree tastes like Vick's vapo-rub.  I think the preground stuff is over-used and mostly repulsive.  A small grating of the actual nut itself can make a dish interesting and intriguing, but there is a fine line between interesting and bringing up horrible memories of stuffy noses and congested lungs.
     Once I had whirred up the volatile concoction, I scooped it into a bowl and handed it to my sous chef, Miss Grace, to apply to the pizza dough.  She struggled with this, too.  The paste was extremely thick and spreading it wasn't easy to do without bunching up the dough she had just worked so hard on.  Pam demonstrated for her, that she could plop blobs of paste in various areas and smash them down with the back of a spoon to get the blobs to meet together in the middle.
     Then, she put on the cheese and it was ready for the oven, and we were ready to work on the Mardi Gras Turnovers.

MARDI GRAS PIZZA TURNOVERS
Adapted from The Everything Pizza Cookbook by Belinda Hulin
Makes 2 Large Calzones

Filling:
1 tablespoon butter
1 tablespoon minced parsley
2 tablespoons minced garlic
1 green onion, minced
2 ounces onion, minced
2½ ounces green pepper, diced
½ cup tomato sauce
2 ounces water
dash Tabasco
1 cup cooked white rice
4½ ounces andouille sausage
6½ ounces peeled, deveined, and cooked shrimp

Crust:
½ cup warm water
½ teaspoon active dry yeast
1 teaspoon sugar
½ teaspoon salt
½ cup bread flour
½ cup cornmeal
½ tablespoon olive oil

Wash:
½ teaspoon cornstarch
½ cup water

Make the filling:  In a heavy saucepan over high heat, melt the butter.  Add the parsley, garlic, green onions, onion, and bell pepper.  Sautè for about three minutes. Add tomato sauce and water.  Bring to a boil.  Reduce heat and cook, stirring often, for ten minutes.  Add Tabasco, rice, andouille, and shrimp.  Mix well.  Remove from heat and allow to cool.

Make the crust:  Combine the yeast, water, and sugar in a bowl and set aside for at least five minutes.  Stir the flour, cornmeal, and ½ teaspoon salt together in the bowl of a mixer fitted with a dough hook.  Add the yeast mixture and olive oil and stir on a low speed until the mixture forms a ball around the hook.  Continue mixing a little longer  until the dough becomes smooth and elastic.  Let rest for an hour in a greased bowl in a warm, dry place.

Assemble and cook:  Preheat the oven to 425º F.  Separate dough into 2 pieces.  On a floured or cornmeal dusted pizza peal or board, roll or stretch each half of the dough to about 13 inches.  Spread half of the shrimp mixture over half of each of the circles.  Moisten the edges of each circle with a little bit of water.  Fold each circle in half over the filling and pinch the edges together to seal.  With a sharp knife, make two or three diagonal cuts across the tops of each calzone.  Mix the cornstarch and ½ cup of water together in a microwave safe bowl.  Microwave until the mixture appears glossy (about 30 seconds).  Brush the tops of each calzone with mixture.  Reserve any extra cornstarch wash in the refrigerator for another use (it will keep up to two weeks).  Transfer calzones to a greased baking sheet.  Bake for 20 minutes or until crust turns a golden brown.  All to stand for a few minutes before serving.

     I had started cooking rice the minute I got home from work on Thursday afternoon.  I knew it was going to take a while to make, so I loaded my saucepan up with the cup of rice and the almost three cups of water and set it up to boil.  It had been done and cooling on the stove when I had finished unearthing my dining room table, before Pam and Grace had arrived.  I had mixed in the vegetables and other ingredients right away and let them cook together for a little bit.  I added the shrimp at the last possible moment, because I didn't want it to get overcooked.  I was using precooked shrimp (yes, I was too cheap and lazy to buy new, uncooked shrimp, when I had perfectly good cooked shrimp in my freezer).  It turned a lovely pink color.  Once the jerk pizza was fully assembled, I showed Grace how to fill one calzone, then gave her the mixture to divide up among the rest of them.
     I sealed the first one while she was finishing filling the other two.  I thought I did a decent job, but when Grace sealed up one of the remaining calzones, she did it with flourish.  She somehow twisted the sealing edges together, giving the finished edge a bit of a ropey look to it.  I told her she ought to redo mine, so they all matched, but she refused.

     I grabbed a knife and slashed through the tops of the calzones.  Grace exclaimed that I was killing them and the shrimp inside!  She was kidding, but I explained to her that we needed to make slashes in the tops of the calzones in order to let the steam out.  Otherwise, her beautiful edges would burst open from the pressure of the steam, and all of the ingredients would leaks out onto the cookie sheet.  Unfortunately, this is something I have learned from experience.


     If you have read some of my previous entries about calzones, you would know that I struggle with what the finished product looks like.  If I don't put anything on the outside of the calzone (the exterior of the dough), it comes out cooked, but not very pretty.  It is crispy-ish. but it doesn't brown, and it has sort of a dull, listless look about it.  I have tried different "washes" to try to bring out the shine, make it a little glossy, but I haven't found the right formula yet.  I have tried milk and egg white, milk and egg yolk, egg whites and water, egg whites and milk, olive oil, butter and egg products, etc.  Sometimes it works and sometimes it doesn't and I am still not sure what the right answer is (you would think that I would keep better notes on the subject or at least know where to find them when I need them).  
     Pam, Jennifer, and I had attended a bread baking class through community education earlier this week.  One of the things the instructor told us was that you can mix corn starch and water together, microwave it for a little bit, and brush it on your bread dough before baking.  She said that gives the bread a shine.  Any amount of the cornstarch mixture that you don't use can go in your refrigerator and it can keep for a couple of months.  I thought I would try it here.
     I wasn't completely impressed with the results.  It definitely browned the dough nicely, but it still didn't have that glossy look I was going for.  It was twice as appetizing as the wash-free calzones I have made in the past, so I am not totally ruling it out for future recipes.
     With both recipes in the oven, it was time to relax a little and fix ourselves a cocktail. I had chosen a celery martini for this week's festivities.  Not only was it the next drink in line that I had ingredients for, it also brought with it the distinction that it was definitely something I had never had before, and I was pretty sure Pam hadn't either.  It's second appealing trait was that it just sounded so weird, I couldn't wait to try it.

CELERY MARTINI

1 measure freshly extracted celery juice
2 measures vodka
¼ measure honey

Place all ingredients in a shaker filled with ice.  Shake vigorously.  Strain into a chilled martini glass.  Garnish with a celery stalk.

     This was a first for me.  I had never heard of celery juice.  Nor did I know where you could buy it or how to make it.  I improvised.  I had a bunch of celery, so I had room for error.  I threw a couple of stalks in the Vita Mix and cranked it up to high.  Optimistically, I placed a strainer over a bowl and poured the contents of my blending bowl into it.  About a third of an ounce ended up in the bowl.  The strainer was full of fibrous pulp.  I pressed on it, thinking I might get the remaining two-thirds of an ounce I needed for one little drink.  A little more juice came out, but not much.  Unable to think of any other options to "extract" juice from celery, I repeated the procedure with four celery stalks.  After stalk #6, I decided I had enough celery juice for one drink for Pam and I to split.  She was already turning her nose up at it, anyway.
     It was an interesting color.  Had I not known what was in the drink (and was vacated of my olfactory senses), I would have thought that it was some kind of melon drink.  It was light green in color, but it had an overwhelming celery aroma.

      I took a sip.  I didn't immediately love it, and I could tell that Pam wasn't even the least bit fond of it.  She winced as she sipped.  I think she probably had her mind made up before she tried it, and I think she actually winced before she got any of it in her mouth.  I found the drink intriguing.  It reminded me of bloody marys.  I thought it would go very nicely with the Mardi Gras Turnovers.  Pam was determined to drink it, even though she found it unappealing.  I offered her some olive juice, which she accepted, but still couldn't drink it without grimacing.  I saved her the agony and dumped the drink for her and made her something else.
     Meanwhile, our pizza and turnovers were ready to come out of the oven.  The jerk pizza was gorgeous with bubbling brown cheese oozing everywhere.

     It was almost a shame to cover it with the salsa, but the salsa was pretty good looking in its own right.

    
  Both recipes were fantastic!  The shrimp turnovers were spectacular.  The shrimp was tender and juicy.  The combination of the vegetables, sauce, and sausage was bold and juicy all at once.  The shrimp cooled things down a little, and the rice melded all of those flavors together.

   The jerk pizza had some really hot spots, spice-wise, but they were tempered by the massive amounts of cheese, and the cool fruit on top.  That was a little deceiving, too, though, because there were little bits of hot pepper mixed into that refreshing topping.  It was sweet and earthy and fiery all at once.  This was absolutely a winner!

Return to the top of the page.
Return to the Caribbean Jerk Pizza recipe.
Return to the Mardi Gras Pizza Turnover recipe.
Return to the Celery Martini recipe.